Building a serverless application with Go, Google Cloud Run and Firebase

Welcome to the first article from the series covering how to build business-oriented applications in Go! In this series, we want to show you how to build applications that are easy to develop, maintain, and fun to work with in the long term.
The idea of this series is to not focus too much on infrastructure and implementation details. But we need to have some base on which we can build later. In this article, we start by covering some basic tools from Google Cloud that can help us to do that.
Note
This is not just another article with random code snippets.
This post is part of a bigger series where we show how to build Go applications that are easy to develop, maintain, and fun to work with in the long term. We are doing it by sharing proven techniques based on many experiments we did with teams we lead and scientific research.
You can learn these patterns by building with us a fully functional example Go web application – Wild Workouts.
We did one thing differently – we included some subtle issues to the initial Wild Workouts implementation. Have we lost our minds to do that? Not yet. 😉 These issues are common for many Go projects. In the long term, these small issues become critical and stop adding new features.
It’s one of the essential skills of a senior or lead developer; you always need to keep long-term implications in mind.
We will fix them by refactoring Wild Workouts. In that way, you will quickly understand the techniques we share.
Do you know that feeling after reading an article about some technique and trying implement it only to be blocked by some issues skipped in the guide? Cutting these details makes articles shorter and increases page views, but this is not our goal. Our goal is to create content that provides enough know-how to apply presented techniques. If you did not read previous articles from the series yet, we highly recommend doing that.
We believe that in some areas, there are no shortcuts. If you want to build complex applications in a fast and efficient way, you need to spend some time learning that. If it was simple, we wouldn’t have large amounts of scary legacy code.
Here’s the full list of 14 articles released so far.
The full source code of Wild Workouts is available on GitHub. Don’t forget to leave a star for our project! ⭐
Why serverless?
Running a Kubernetes cluster requires a lot of support from “DevOps teams”. Let’s skip the fact that DevOps is not a job title for now.

Slide from The gordian knot - Alberto Brandolini
Small applications that can be easily run on one virtual machine are now being deployed on super complex Kubernetes clusters. All these clusters require a lot of maintenance.
On the other hand, moving applications to containers has given us much flexibility in building and deploying them. It allowed us to do rapid deployments of hundreds of microservices with a lot of autonomy. But the cost for that is high.
Wouldn’t it be great if any fully managed solution existed? 🤔
Maybe your company is already using a managed Kubernetes cluster. If so, you probably already know that even your managed cluster still requires a ton of “DevOps” support.
Maybe serverless? Well, splitting a big application to multiple, independent Lambdas (Cloud Functions) is a great way to an unmaintainable cataclysm.

But wait, is it the only way to build serverless applications? No!
Google Cloud Run
The idea of Google Cloud Run is pretty simple - you just need to provide a Docker container, and Google Cloud runs it.
Inside this container, you can run an application written in any language that can expose a port with your HTTP or gRPC API.
You are not limited to synchronous processing – you can process Pub/Sub messages inside of this container.
And that’s all that you need from the infrastructure side. Google Cloud does all the magic. Based on the traffic, the container will automatically scale up and down. Sounds like a perfect solution?
In practice, it is not so simple.
There are many articles showing how to use Google Cloud Run, but they usually show small bricks that may be used for building an application.
It’s hard to join all these bricks from multiple places to create a fully working project (been there, done that).
In most cases, these articles leave out the problem of vendor lock-in. The deployment method should be just an implementation detail. I’ve already covered this topic in the Why using Microservices or Monolith can be just a detail? article in 2018.
But what is most important – using all the newest and most shiny technologies doesn’t mean that your application will not become a hated legacy in the next 3 months.
Serverless solves only infrastructure challenges. It doesn’t stop you from building an application that is hard to maintain. I even have the impression that it’s the opposite – all these fancy applications sooner or later are the hardest to maintain.
For this series of articles, we created a fully functional, real-life application. You can deploy this application with one command to Google Cloud using Terraform. You can run the local copy with one docker-compose command.
There is also one thing that we are doing differently than others. We included some subtle issues, that from our observations are common in Go projects. In the long term, these small issues become critical and stop us from adding new features.
Have we lost our minds? Not yet. 😉 This approach will help you to understand what issues you can solve and what techniques can help. It is also a kind of challenge for practices that we use. If something is not a problem, why should we use any technique to solve it?
Plan
In the next couple of articles, we will cover all topics related to running the application on Google Cloud. In this part, we didn’t add any issues or bad practices. 😉 The first articles may be a bit basic if you already have some experience in Go. We want to ensure that if you are just starting with Go, you will be able to follow more complex topics that come next.
Next, we will refactor parts of the application handling business logic. This part will be much more complex.
Join over 17k subscribers of our newsletter and get a free e-book!
Go With The Domain Three Dots Labs
Running the project locally
The ability to run a project locally is critical for efficient development. It is very annoying when you are not able to check changes that you did in a simple and fast way.
It’s much harder to achieve it for projects built from hundreds of microservices. Fortunately, our project has only 5 services. 😉
In Wild Workouts we created Docker Compose with live code reloading for both frontend and backend.
For the frontend, we are using a container with vue-cli-service serve tool.
For the backend, the situation is a bit more complex.
In all containers, we are running the reflex tool. reflex listens for any code changes that trigger the recompilation of the service.
If you are interested in details, you can find them in our Go Docker dev environment with Go Modules and live code reloading blog post.
Requirements
The only requirements needed to run the project are Docker and Docker Compose.
Running
git clone https://github.com/ThreeDotsLabs/wild-workouts-go-ddd-example.git && cd wild-workouts-go-ddd-example
And run Docker Compose:
docker-compose up
After downloading all JS and Go dependencies, you should see a message with the frontend address:
web_1             | $ vue-cli-service serve
web_1             |  INFO  Starting development server...
web_1             |  DONE  Compiled successfully in 6315ms11:18:26 AM
web_1             |
web_1             |
web_1             |   App running at:
web_1             |   - Local:   http://localhost:8080/
web_1             |
web_1             |   It seems you are running Vue CLI inside a container.
web_1             |   Access the dev server via http://localhost:<your container's external mapped port>/
web_1             |
web_1             |   Note that the development build is not optimized.
web_1             |   To create a production build, run yarn build.
Congratulations! Your local version of the Wild Workouts application is available at http://localhost:8080/.
There is also a public version available at https://threedotslabs-wildworkouts.web.app.
What Wild Workouts can do?
How often did you see tutorials without any real-life functionality? How often didn’t patterns from these tutorials work in real projects? Probably too often. 😉 Real life is not as simple as in tutorials.
To avoid this problem, we created Wild Workouts application as a fully functional project. It’s much harder to do shortcuts and skip extra complexity when an application needs to be complete. It makes all articles longer, but there are no shortcuts here. If you don’t spend enough time in the beginning, you will lose much more time later during the implementation. Or even worse – you’ll be fixing problems in a rush with the application already running on production.
tl;dr
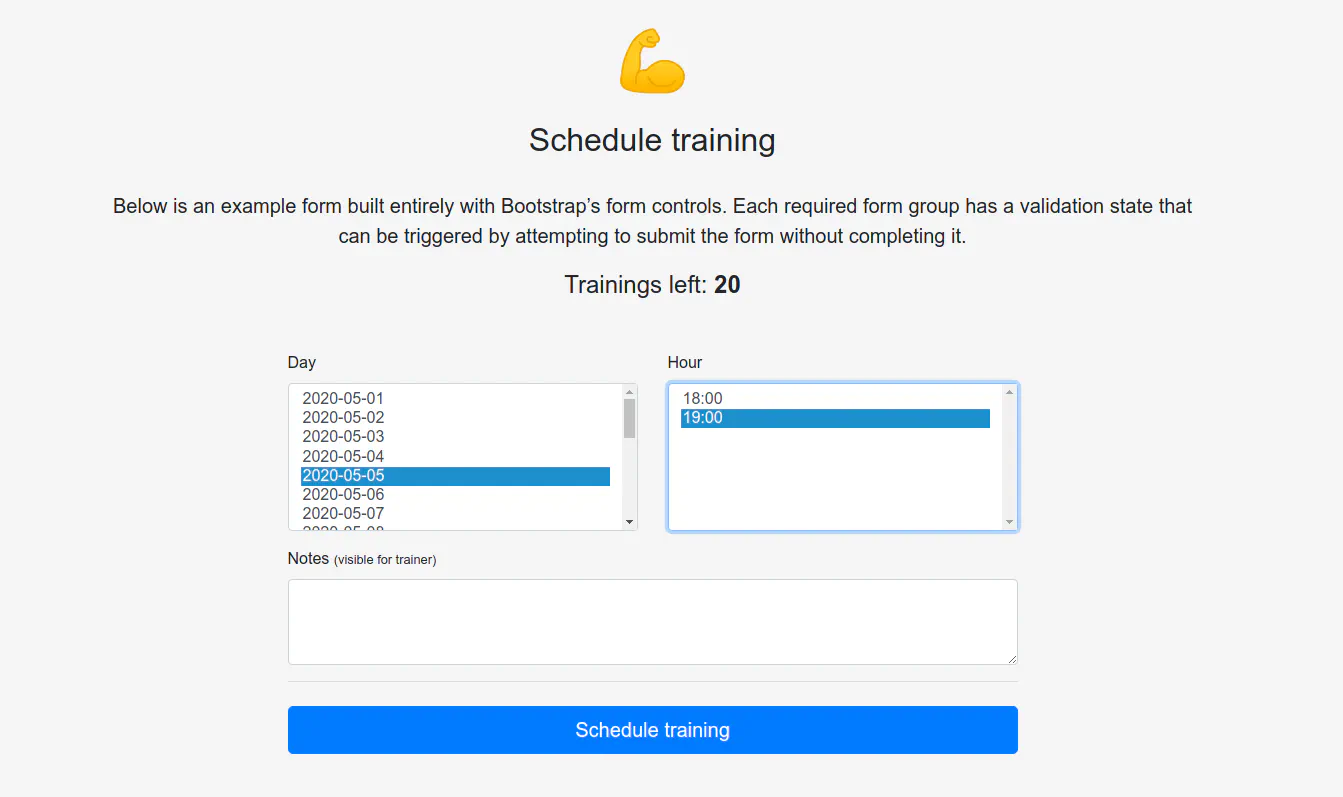
Wild Workouts is an application for personal gym trainers and attendees.
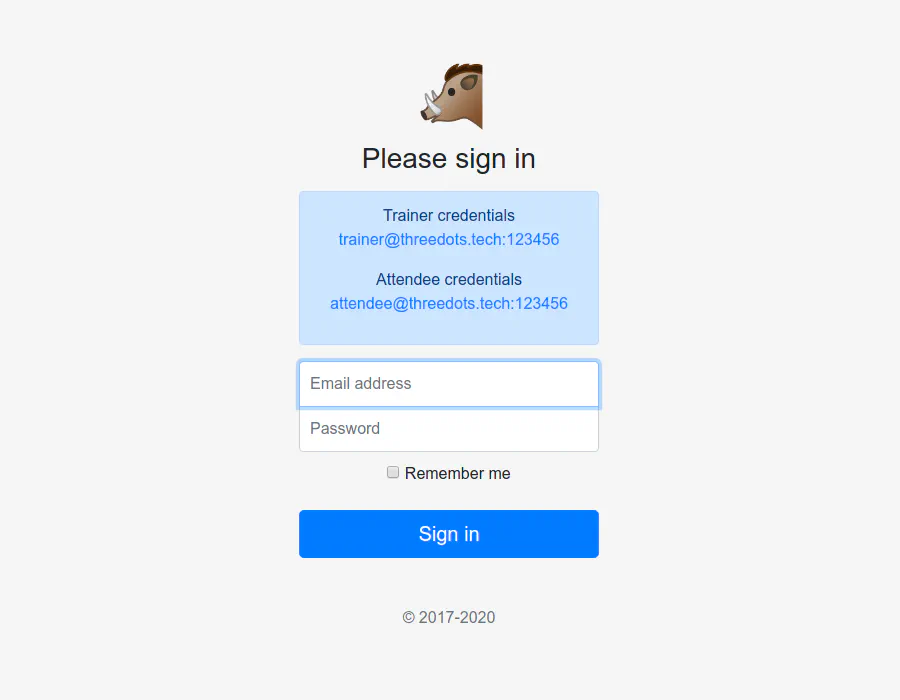
Trainers can set a schedule when they are available for the training.
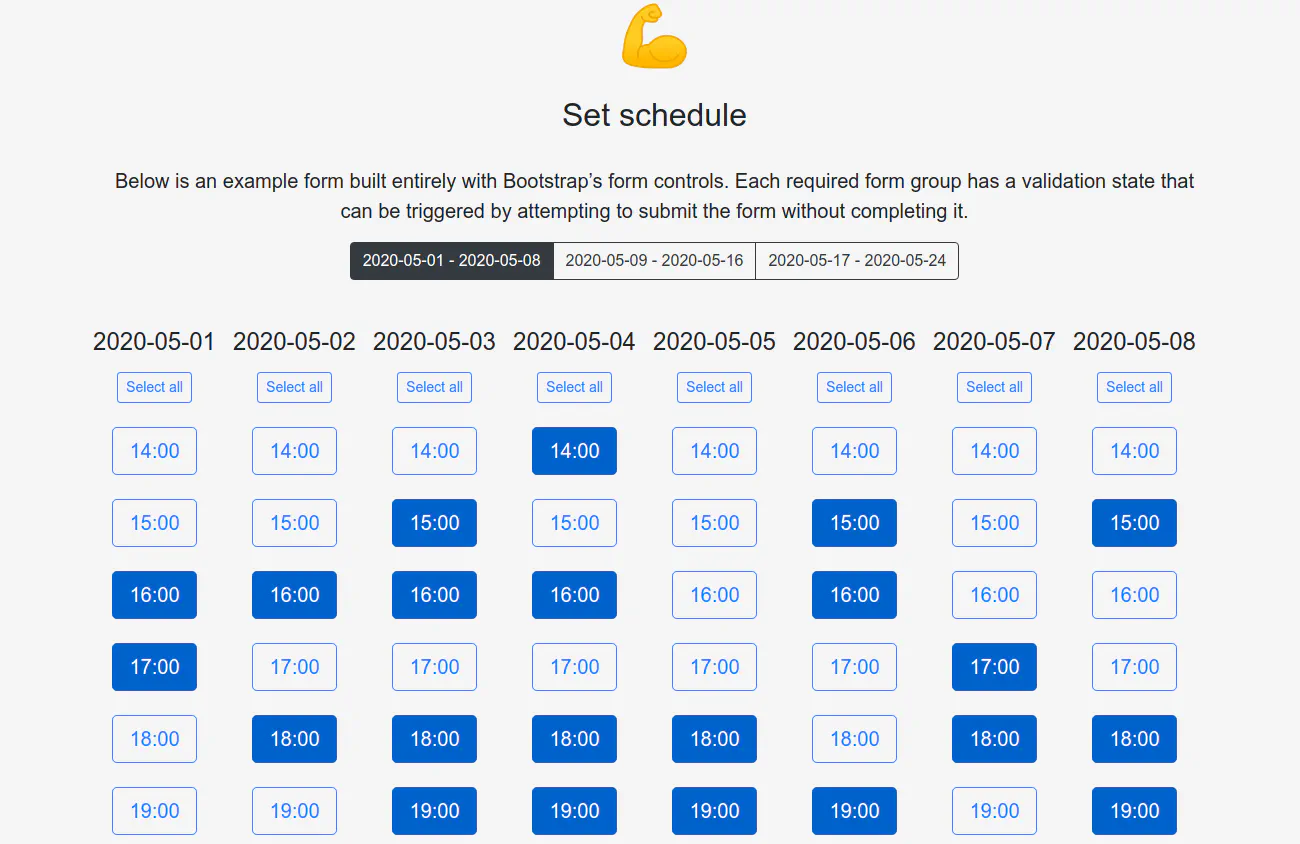
Attendees can schedule training for provided dates.
Other functionalities are:
- management of “credits” (how many trainings the attendee can schedule)
- cancellation
- if a training is canceled less than 24 hours before the time it begins, the attendee will not receive their credits back
- training reschedule
- if someone wants to reschedule a training less than 24 hours before the time it begins, it needs to be approved by the second participant (trainer or attendee)
- calendar view
Sounds simple. What can go wrong? 🤔
Frontend
If you are not interested in the frontend part, you can go straight to the Backend section.
I’m rather a backend engineer and to be honest I’m not the greatest JavaScript and frontend specialist. 😉 But we can’t have an application working end-to-end without a frontend!
In this series, we focus on the backend part. I will give a high-level overview of what technologies I used on the frontend. It will be nothing new to you if you have any basic frontend knowledge. For more details, I recommend to check the source code in the web/ directory.
If you want to know more about how the frontend is built, please let us know in the comments!OpenAPI (Swagger) client
Nobody likes to keep API contracts up to date manually. It’s annoying and counterproductive to keep multiple boring JSONs up-to-date. OpenAPI solves this problem with JavaScript HTTP client and Go HTTP server generated from the provided specification. We will dive into details in the Backend part.
Bootstrap
You probably already know Bootstrap, the greatest friend of every backend engineer, like me. 😉 Fighting with HTML and CSS is the part of frontend development that I dislike the most. Bootstrap provided me almost all building blocks needed for creating HTML of the application.
Vue.js
After checking a couple of the most popular frontend frameworks, I decided to use Vue.js. I really enjoyed the simplicity of this solution.
I was starting my journey as a full-stack developer in the pre-jQuery times. The frontend tooling made huge progress… but I’ll stay with the backend for now. 😉
Backend
The backend of Wild Workouts is built from 3 services.
trainer– provides public HTTP and internal gRPC endpoints for managing trainer scheduletrainings– provides public HTTP for managing attendee trainingsusers– provides public HTTP endpoints and internal gRPC endpoints , manages credits and user data
If a service exposes 2 types of APIs, each of them is exposed in a separate process.
Public HTTP API
Most operations performed by applications are triggered by the public HTTP API.
I’ve heard many times the question from newcomers to Go what framework they should use to create an HTTP service.
I always advise against using any kind of HTTP framework in Go.
A simple router, like chi is more than enough.
chi provides us only the lightweight glue to define what URLs and methods are supported by our API.
Under the hood, it uses the Go standard library http package, so all related tools like middlewares are 100% compatible.
It may be a bit weird to not use a framework if you are coming from any language where Spring, Symfony, Django, or Express may be the obvious choice. It was weird for me too. Using any kind of framework in Go adds unnecessary complexity and will couple your project with this framework. KISS. 😉
All the services are running the HTTP server in the same way. It sounds like a good idea to not copy it 3 times.
func RunHTTPServer(createHandler func(router chi.Router) http.Handler) {
   apiRouter := chi.NewRouter()
   setMiddlewares(apiRouter)

   rootRouter := chi.NewRouter()
   // we are mounting all APIs under /api path
   rootRouter.Mount("/api", createHandler(apiRouter))

   logrus.Info("Starting HTTP server")

   http.ListenAndServe(":"+os.Getenv("PORT"), rootRouter)
}
chi provides us with a set of useful built-in HTTP middlewares, but we are not limited only to them. All middlewares compatible with Go standard library will work.
Note
Long story short – middlewares allow us to do anything before and after a request is executed (with access to the http.Request).
Using HTTP middlewares gives us a lot of flexibility in building our custom HTTP server.
We are building our server from multiple decoupled components that you can customize for your purposes.
func setMiddlewares(router *chi.Mux) {
   router.Use(middleware.RequestID)
   router.Use(middleware.RealIP)
   router.Use(logs.NewStructuredLogger(logrus.StandardLogger()))
   router.Use(middleware.Recoverer)

   addCorsMiddleware(router)
   addAuthMiddleware(router)

   router.Use(
      middleware.SetHeader("X-Content-Type-Options", "nosniff"),
      middleware.SetHeader("X-Frame-Options", "deny"),
   )
   router.Use(middleware.NoCache)
}
We have our framework almost ready now. :) It’s time to use that. We can call server.RunHTTPServer in the trainings service.
package main
// ...
func main() {
   // ...
    server.RunHTTPServer(func(router chi.Router) http.Handler {
        return HandlerFromMux(HttpServer{firebaseDB, trainerClient, usersClient}, router)
    })
}
createHandler needs to return http.Handler.
In our case it is HandlerFromMux generated by oapi-codegen.
It provides us all the paths and query parameters from the OpenAPI specs.
// HandlerFromMux creates http.Handler with routing matching OpenAPI spec based on the provided mux.
func HandlerFromMux(si ServerInterface, r chi.Router) http.Handler {
   r.Group(func(r chi.Router) {
      r.Use(GetTrainingsCtx)
      r.Get("/trainings", si.GetTrainings)
   })
   r.Group(func(r chi.Router) {
      r.Use(CreateTrainingCtx)
      r.Post("/trainings", si.CreateTraining)
   })
// ...
# ...
paths:
  /trainings:
    get:
      operationId: getTrainings
      responses:
        '200':
          description: todo
          content:
            application/json:
              schema:
                $ref: '#/components/schemas/Trainings'
        default:
          description: unexpected error
          content:
            application/json:
              schema:
                $ref: '#/components/schemas/Error'
# ...
If you want to make any changes to the OpenAPI spec, you need to regenerate Go server and JavaScript clients after. You need to run:
make openapi
Part of the generated code is ServerInterface.
It contains all methods that need to be supported by the API.
Implementation of server functionality is done by implementing that interface.
type ServerInterface interface {
   //  (GET /trainings)
   GetTrainings(w http.ResponseWriter, r *http.Request)
   //  (POST /trainings)
   CreateTraining(w http.ResponseWriter, r *http.Request)
    // ...
}
This is an example of how trainings.HttpServer is implemented:
package main

import (
   "net/http"

   "github.com/go-chi/render"
   "github.com/ThreeDotsLabs/wild-workouts-go-ddd-example/pkg/internal/auth"
   "github.com/ThreeDotsLabs/wild-workouts-go-ddd-example/pkg/internal/genproto/trainer"
   "github.com/ThreeDotsLabs/wild-workouts-go-ddd-example/pkg/internal/genproto/users"
   "github.com/ThreeDotsLabs/wild-workouts-go-ddd-example/pkg/internal/server/httperr"
)

type HttpServer struct {
   db            db
   trainerClient trainer.TrainerServiceClient
   usersClient   users.UsersServiceClient
}

func (h HttpServer) GetTrainings(w http.ResponseWriter, r *http.Request) {
   user, err := auth.UserFromCtx(r.Context())
   if err != nil {
      httperr.Unauthorised("no-user-found", err, w, r)
      return
   }

   trainings, err := h.db.GetTrainings(r.Context(), user)
   if err != nil {
      httperr.InternalError("cannot-get-trainings", err, w, r)
      return
   }

   trainingsResp := Trainings{trainings}

   render.Respond(w, r, trainingsResp)
}

// ...
But HTTP paths are not the only thing generated from OpenAPI spec. More importantly, it provides us also the models for responses and requests. Models are, in most cases, much more complex than API paths and methods. Generating them can save time, issues, and frustration during any API contract changes.
# ...
 schemas:
    Training:
      type: object
      required: [uuid, user, userUuid, notes, time, canBeCancelled, moveRequiresAccept]
      properties:
        uuid:
          type: string
          format: uuid
        user:
          type: string
          example: Mariusz Pudzianowski
        userUuid:
          type: string
          format: uuid
        notes:
          type: string
          example: "let's do leg day!"
        time:
          type: string
          format: date-time
        canBeCancelled:
          type: boolean
        moveRequiresAccept:
          type: boolean
        proposedTime:
          type: string
          format: date-time
        moveProposedBy:
          type: string

    Trainings:
      type: object
      required: [trainings]
      properties:
        trainings:
          type: array
          items:
            $ref: '#/components/schemas/Training'
# ...
// Training defines model for Training.
type Training struct {
   CanBeCancelled     bool       `json:"canBeCancelled"`
   MoveProposedBy     *string    `json:"moveProposedBy,omitempty"`
   MoveRequiresAccept bool       `json:"moveRequiresAccept"`
   Notes              string     `json:"notes"`
   ProposedTime       *time.Time `json:"proposedTime,omitempty"`
   Time               time.Time  `json:"time"`
   User               string     `json:"user"`
   UserUuid           string     `json:"userUuid"`
   Uuid               string     `json:"uuid"`
}

// Trainings defines model for Trainings.
type Trainings struct {
   Trainings []Training `json:"trainings"`
}
Cloud Firestore database
All right, we have the HTTP API. But even the best API without any data and without the ability to save anything is useless.
If we want to build the application in the most modern, scalable, and truly serverless way, Firestore is a natural choice. We will have that out of the box. What is the cost of that?

If we are talking about financial cost for the Europe multi-region option we need to pay:
- $0.06 per 100,000 documents reads
- $0.18 per 100,000 documents writes
- $0.02 per 100,000 documents deletes
- $0.18/GiB of stored data/month
Sounds pretty cheap?
For comparison, let’s take the cheapest Cloud SQL MySQL db-f1-micro instance with shared Virtual CPU and 3 GB of storage as a reference – it costs $15.33/month.
The cheapest instance with high availability and with 1 non-shared Virtual CPU costs $128.21/month.
What is even better, in the free plan, you can store up to 1 GiB of data with 20k document writes per day.
Firestore is a NoSQL database, so we should not expect to build relational models in the SQL manner. Instead of that, we have a system of hierarchical collections. In our case, the data model is pretty simple, so we have only one level of collections.
In contrast to many NoSQL databases, Firestore offers ACID transactions on any operation. It also works when updating multiple documents.
Firestore limitations
The important limitation may be the limit of 1 update / second / one document. It still means that you can update a lot of independent documents in parallel. It is an important factor that you should consider while designing your database. In some cases, you should consider batching operations, different documents design, or using a different database. If data is changing often, maybe a key-value database would be a good choice?
From my experience, the limitation of 1 update per second per document is not a serious problem. In most cases, when I was using Firestore, we were updating a lot of independent documents. This is also true when using Firestore for event sourcing - you will only use append operations. In Wild Workouts, we should also not have a problem with this limit. 😉
Note
I have also observed that Firestore needs some time to warm up. In different words – if you want to insert 10 mln documents within one minute after you just set up a new project, it may not work. I guess this is related to some internal magic that handles scaleability.
Fortunately, in the real world, it is not common to have traffic spikes from 0 to 10 mln writes / minute.
Running Firestore locally
Unfortunately Firestore emulator is not perfect. 😉 I found some situations where the emulator was not 100% compatible with the real version. I also had some situations when I was doing an update and read of the same document in the transaction, and it caused a deadlock. From my point of view, this functionality is enough for local development.
The alternative may be to have a separate Google Cloud project for local development. My preference here is to have a local environment that is truly local and doesn’t depend on any external services. It is also easier to set up and can be used later in Continuous Integration.
Since the end of May, the Firestore emulator provides a UI. It is added to the Docker Compose and is available at http://localhost:4000/. When I’m writing this, sub-collections are not displayed properly in the UI in the emulator. Don’t worry, for Wild Workouts it’s not a problem. 😉
Using Firestore
Apart from Firestore implementation, the code works in the same way locally and on the production.
When we are using emulator locally, we need to run our application with env FIRESTORE_EMULATOR_HOST set to emulator hostname (in our case firestore:8787).
It is set in the .env file.
On production, all magic is done by Google Cloud under the hood, and no extra configuration is needed.
firebaseClient, err := firestore.NewClient(ctx, os.Getenv("GCP_PROJECT"))
if err != nil {
    panic(err)
}
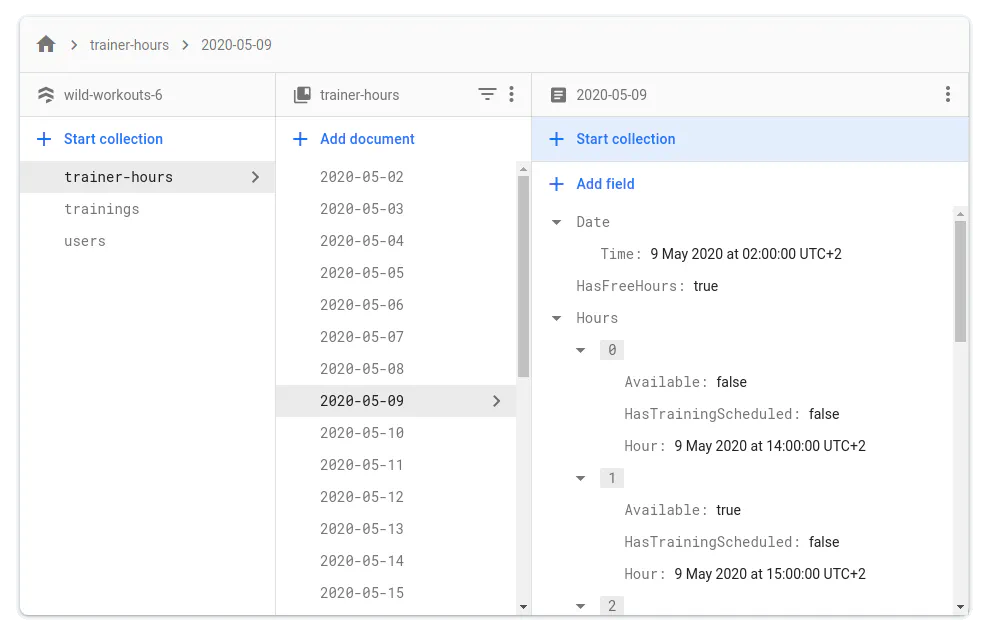
Here is the example of how I used Firestore client for querying trainer schedule. You can see how I used queries functionality to get only dates from the queried dates interval.
package main

import (
    // ...
   "cloud.google.com/go/firestore"
   // ...
)

// ...

type db struct {
   firestoreClient *firestore.Client
}

func (d db) TrainerHoursCollection() *firestore.CollectionRef {
   return d.firestoreClient.Collection("trainer-hours")
}

// ...

func (d db) QueryDates(params *GetTrainerAvailableHoursParams, ctx context.Context) ([]Date, error) {
   iter := d.
      TrainerHoursCollection().
      Where("Date.Time", ">=", params.DateFrom).
      Where("Date.Time", "<=", params.DateTo).
      Documents(ctx)

   var dates []Date

   for {
      doc, err := iter.Next()
      if err == iterator.Done {
         break
      }
      if err != nil {
         return nil, err
      }

      date := Date{}
      if err := doc.DataTo(&date); err != nil {
         return nil, err
      }
      date = setDefaultAvailability(date)
      dates = append(dates, date)
   }

   return dates, nil
}
There is also no extra data mapping needed. Firestore library can marshal any struct with public fields or map[string]interface. As long as there is nothing weird inside. 😉
You can find the entire specification of how conversion is done in cloud.google.com/go/firestore GoDoc.
type Date struct {
   Date         openapi_types.Date `json:"date"`
   HasFreeHours bool               `json:"hasFreeHours"`
   Hours        []Hour             `json:"hours"`
}
date := Date{}
if err := doc.DataTo(&date); err != nil {
    return nil, err
}
Production deployment tl;dr
You can deploy your own version of Wild Workouts with one command:
> cd terraform/
> make

Fill all required parameters:
	project [current: wild-workouts project]:       # <----- put your Wild Workouts Google Cloud project name here (it will be created)
	user [current: email@gmail.com]:                # <----- put your Google (Gmail, G-suite etc.) e-mail here
	billing_account [current: My billing account]:  # <----- your billing account name, can be found here https://console.cloud.google.com/billing
	region [current: europe-west1]:
	firebase_location [current: europe-west]:

# it may take a couple of minutes...

The setup is almost done!

Now you need to enable Email/Password provider in the Firebase console.
To do this, visit https://console.firebase.google.com/u/0/project/[your-project]/authentication/providers

You can also downgrade the subscription plan to Spark (it's set to Blaze by default).
The Spark plan is completely free and has all features needed for running this project.

Congratulations! Your project should be available at: https://[your-project].web.app

If it's not, check if the build finished successfully: https://console.cloud.google.com/cloud-build/builds?project=[your-project]

If you need help, feel free to contact us at https://threedots.tech
We will describe the deployment in detail in the next articles.
What’s next?
That’s all for today. In the next article, I will cover internal gRPC communication between services. After that, I will cover the HTTP Firebase authentication topic.The code with gRPC communication and authentication is already on our GitHub. Feel free to read, run, and experiment with it.
Deployment and infrastructure
In parallel Miłosz is working on articles describing deployment and infrastructure part. It will cover in details:
- Terraform
- Cloud Run
- CI/CD
- Firebase hosting
What is wrong with this application?!
After finishing all articles describing the current application, we will start the part related with refactoring and adding new features to Wild Workouts.
We don’t want to use many fancy techniques just to make our CVs look better. Our goal is to solve issues present in the application using Domain-Driven Design, Clean Architecture, CQRS, Event Storming, and Event Modeling.
We will do it by refactoring. It should be then visible what issues are solved and how it makes the implementation more clean. Maybe during this we will even see that some of these techniques are not useful in Go, who knows. 😉
Do you see any of the issues that we included in this application? Please post your guess in comments. :)
See you in the next week.