Making Games in Go for Absolute Beginners

Here’s a rant I often see in developer communities:
I used to love programming because I like building stuff. But my full-time job killed my passion. I spend more time in meetings, fighting over deadlines, and arguing in reviews than working with code. Am I burned out? Is there hope, or do I need a new hobby?
Sounds familiar? No wonder we keep looking forward to using a new framework or database — we’re bored. So here’s my tip to cure some of your burnout: Start coding for fun again and reclaim your hobby. And what is more fun than creating your own world with code?
Wanting to make my own video game pushed me into programming 20 years ago. I didn’t make a career out of it, even though I created some small games using different tech stacks. I keep returning to it, and for me, it’s the most fun activity related to coding. Especially if done with friends over a weekend for a game jam.
This post is my attempt at getting you to write games from scratch. (And if you want to pick up a new language too, check Go in One Evening!)
Why Go? I like it, and Ebitengine, the library I will show here, is great to work with. Like many Go libraries, it helps you do what you need and stays out of the way — it’s not a framework.
Of course, a bigger game engine simplifies many things but also comes with bloat and a specific approach. A big part of why making games is fun is you get to do things your way and don’t need to care if it’s the right way. And it’s a great exercise to learn how games work.
First, a warning. Once you understand how games work, some of the magic is gone when playing them. You will start wondering, “How does it work?” instead of enjoying the game. Thankfully, making games compensates for this.
Note
Disclaimer: I’m a hobbyist game developer. I do it as it’s tons of fun, but I never worked on a professional game. Expect personal experience here. I might show some code that would be dumb when used in a “real” game (performance-wise, for example). Let me know in the comments if you find any errors!
The basics
I remember having a hard time understanding how exactly games work. How do you make the objects in the game do what they do? It’s more obvious if you use a game engine, but what if you start from scratch?
You probably know that a movie is a very long collection of images, displayed one after the other so fast that our brains can’t tell the difference. Usually, 24 or 60 images (frames) per second (FPS).
A video game is the same idea, but the images (frames) don’t exist beforehand, so you must generate (draw) them on the fly. And you can press some buttons to change how the next frame looks.
This may seem too simplistic, right? “What? But how do you make a character jump?” You move the image up the screen over time and then back down. And you stop it from moving when it “touches” other images. 2D games are basically made of images drawn on top of each other.
I was surprised to learn that games are basically infinite loops. You keep drawing images on the screen.
for {
	DrawFrame()
}
Besides drawing, you need to update the logic of the game. It includes things like checking buttons pressed, updating the player’s health, and checking collisions. The logic decides what images to draw and where, and the Draw function does it. Each time the logic is updated is known as a tick.
for {
	// One tick
	UpdateLogic()
	DrawFrame()
}
I know this looks hardly exciting, but let this idea sink in: your game does these two things over and over, 60 times per second. Just a single thread with this infinite loop (for now, forget goroutines exist).
Even though the idea is simple, keeping the loop running at the same speed on all systems is not trivial. Ebitengine takes care of this for you, running the game at 60 ticks per second.
Logic is the part you should be familiar with: it’s regular Go code. Drawing images is where things get more complex, and that’s why you use Ebitengine. It helps with drawing images, playing sounds, and checking inputs. How the logic works is mainly on you.
Ebitengine provides a Game interface you need to implement.
type Game interface {
	Update() error
	Draw(screen *ebiten.Image)
	Layout(outsideWidth, outsideHeight int) (screenWidth, screenHeight int)
}
The Update and Draw functions work as in the loop above. Layout is used for scaling the game screen — you don’t need to worry about it now.
Update is called every tick and updates the game logic. If an error is returned, the game quits.
Draw is called every frame. The screen argument is an image you draw on, like a canvas.
Setting up the project
First, let’s kick off the boring stuff: create a module and add Ebitengine (formerly called Ebiten, hence the package name).
go mod init game
go get github.com/hajimehoshi/ebiten/v2
Here’s the minimal code you need to start a game. It’s just an empty implementation of the Game interface. Running it should show a blank black window.
package main

import "github.com/hajimehoshi/ebiten/v2"

type Game struct{}

func (g *Game) Update() error {
	return nil
}

func (g *Game) Draw(screen *ebiten.Image) {

}

func (g *Game) Layout(outsideWidth, outsideHeight int) (screenWidth, screenHeight int) {
	return outsideWidth, outsideHeight
}

func main() {
	g := &Game{}

	err := ebiten.RunGame(g)
	if err != nil {
		panic(err)
	}
}
Note
I’m pretty liberal with error handling in these examples. We’re just prototyping and having fun, so I’m okay with raising a panic. With most errors, you can either crash the game or log it and continue.
Loading assets
If your graphic skills are similar to mine (the term “programmer art” exists for a reason 🙃), you may prefer using ready assets when prototyping.
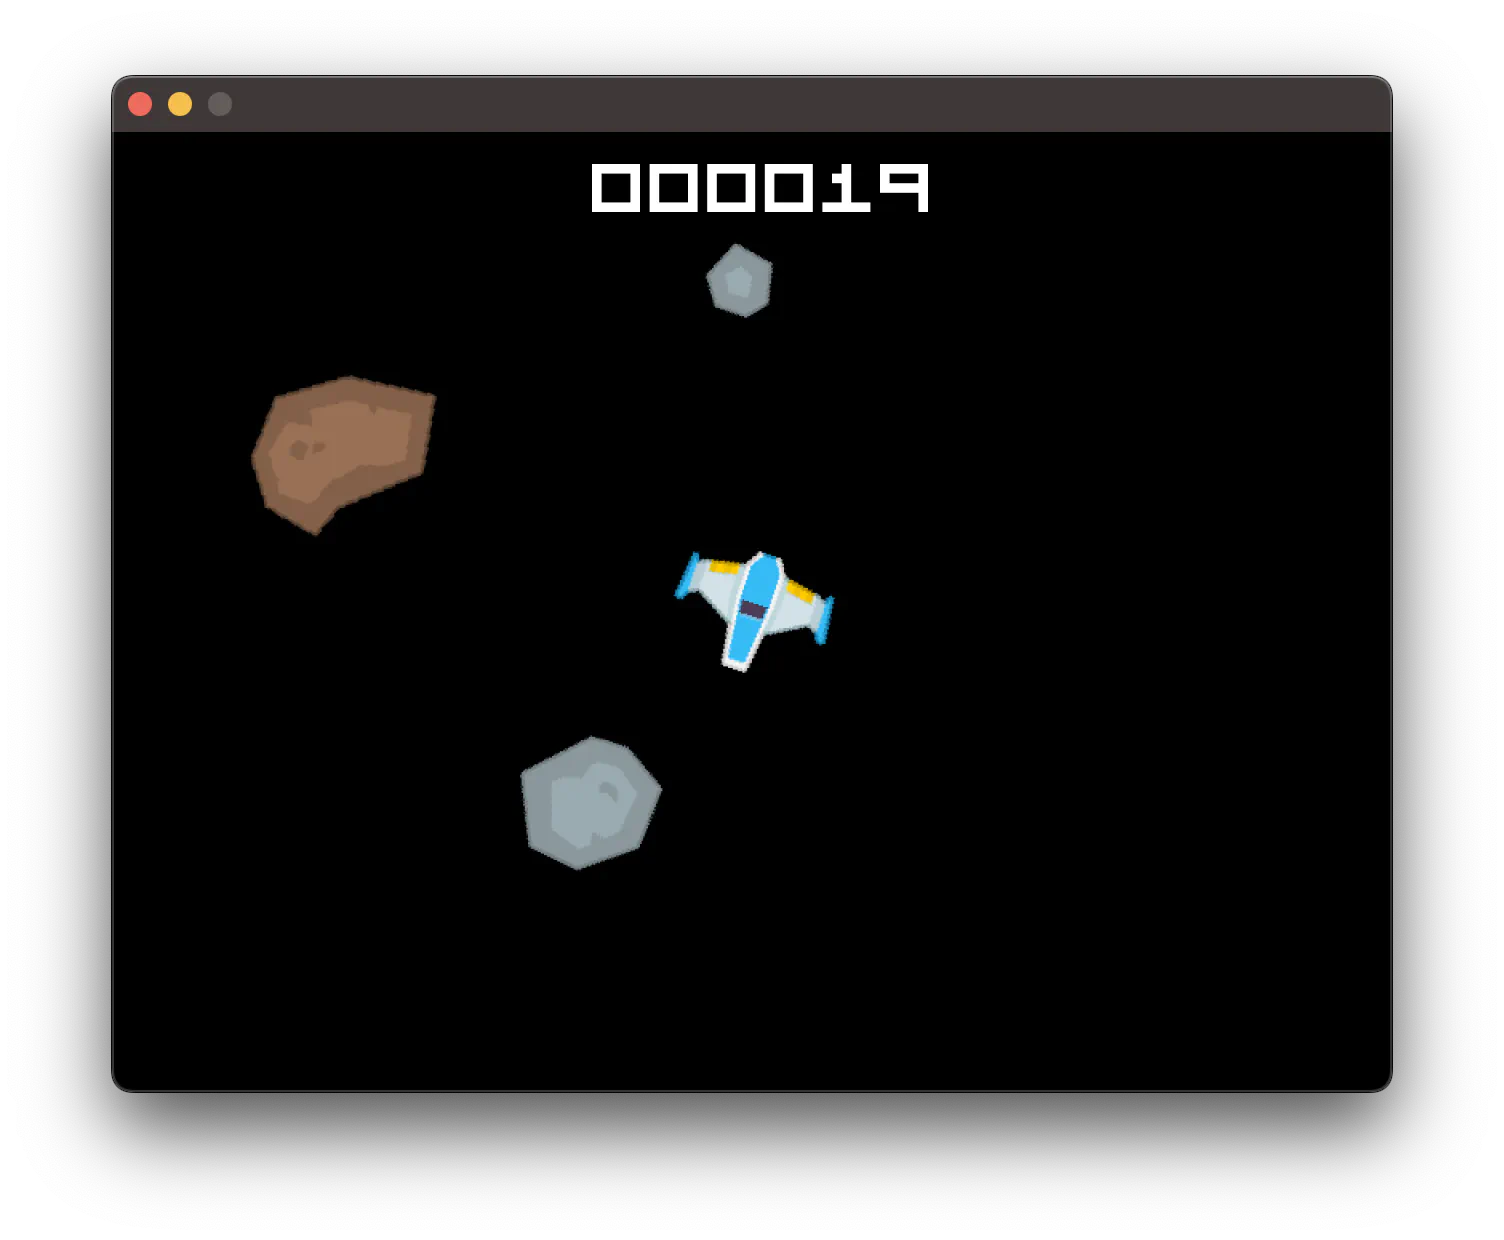
Unless you want to create them yourself, I encourage you to play with free-to-use assets. Personally, I love the collection from Kenney. Every time I look for inspiration, I browse the 2D assets there and find something that looks like a cool game to make. I’ll use the space shooter pack below to make a trivial Asteroids clone.
To load the assets in code, use embed — it’s like it was meant for making games. You know the paths are right on compile time. You also don’t need to care about the distribution, as the binary contains the assets. It works even for mobile apps!
You will likely have many assets, so consider embedding the entire directory:
import "embed"

//go:embed assets/*
var assets embed.FS
You can now load the images from the assets collection. I’m using the must pattern here and keep sprites as global variables for simplicity. (A sprite is just another name for a 2D graphic.)
Note the empty "image/png" import used for decoding.
import (
	"image"
	_ "image/png"

	"github.com/hajimehoshi/ebiten/v2"
)

var PlayerSprite = mustLoadImage("assets/player.png")

func mustLoadImage(name string) *ebiten.Image {
	f, err := assets.Open(name)
	if err != nil {
		panic(err)
	}
	defer f.Close()

	img, _, err := image.Decode(f)
	if err != nil {
		panic(err)
	}

	return ebiten.NewImageFromImage(img)
}
Drawing Images
All the drawing happens in the Draw method.
func (g *Game) Draw(screen *ebiten.Image) {

}
The screen argument is the image displayed every frame (after the method returns). Your job is to draw other images (or text) on it.
The key method of ebiten.Image is DrawImage, which draws another image onto it.
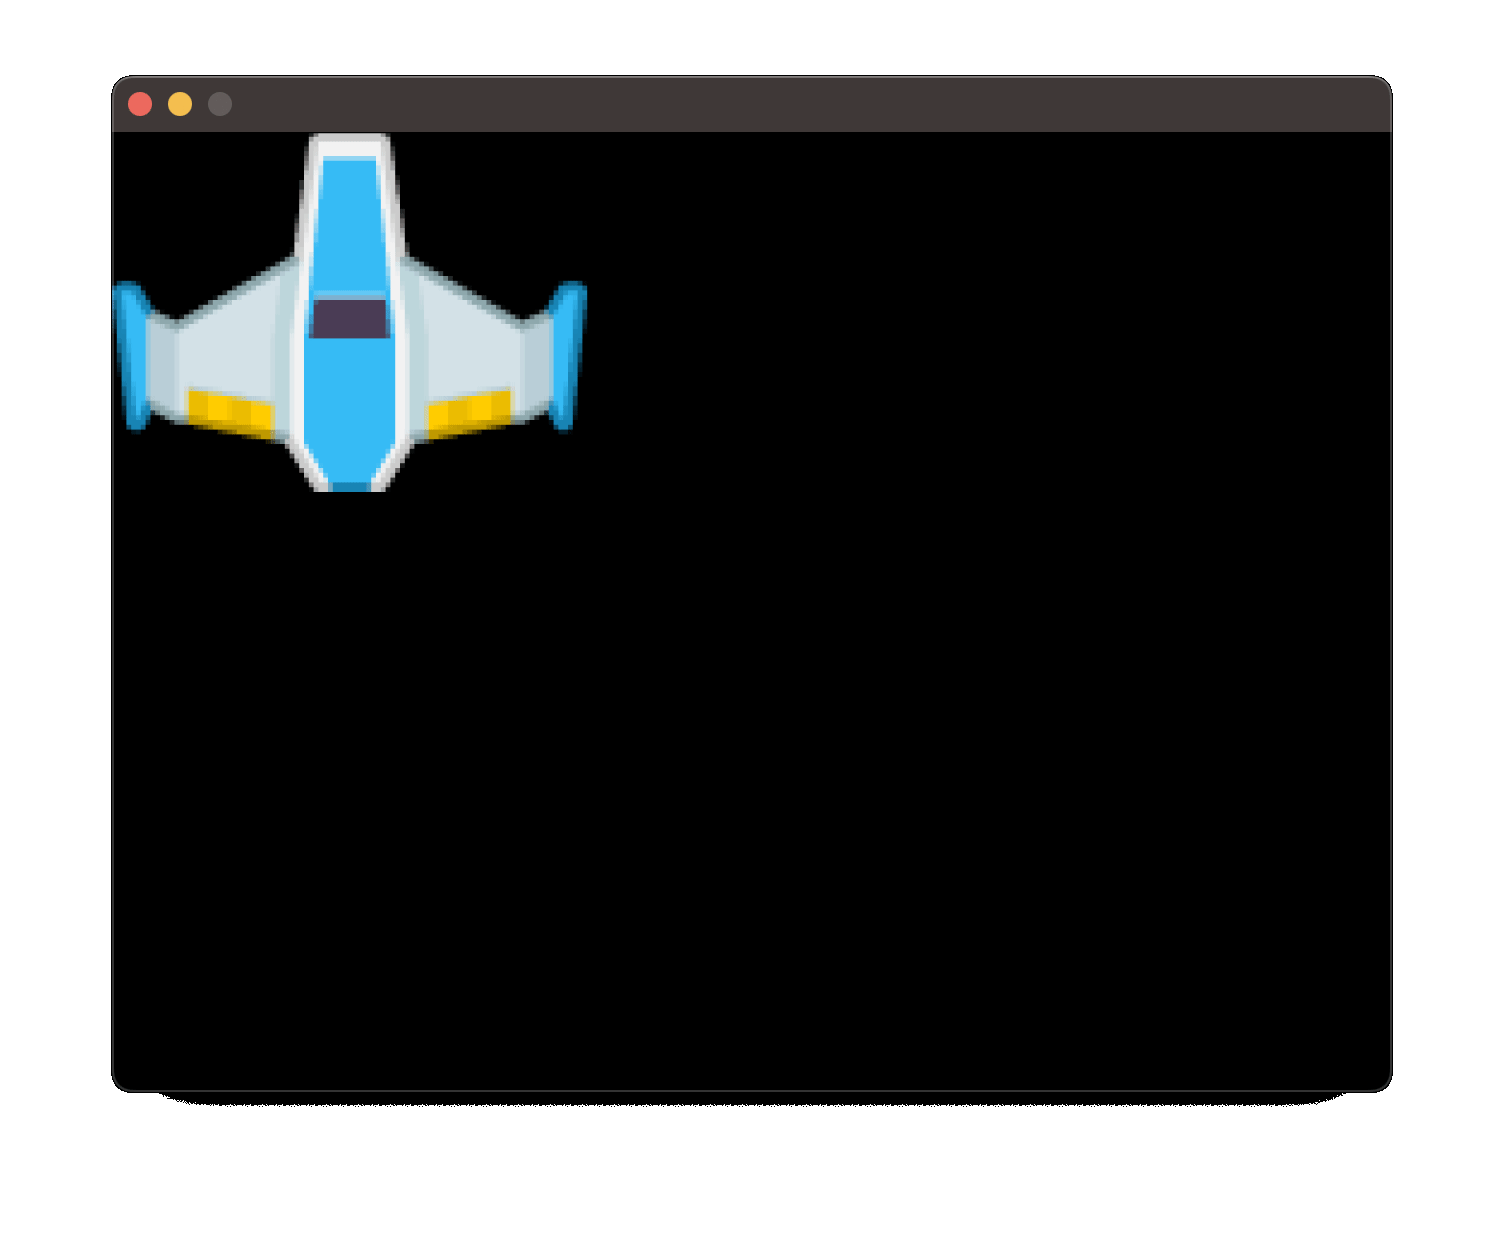
screen.DrawImage(PlayerSprite, nil)
The first argument is the image you want to draw. The second is the ebiten.DrawImageOptions struct that decides where and how the image is drawn. Passing nil keeps the default options.
Here’s the result: the player’s spaceship is drawn in the screen’s top-left corner.

The drawing options struct has a few fields; the one to focus on first is the GeoM matrix. The docs go into detail on the math behind it, and math is super helpful in making games. But if I just wanted to make a game, the last thing I’d like to read about is algebra, so I’ll try to simplify it here.
Do you know how when you copy and paste an image in a graphics editor, the pasted part stays selected, and you can keep moving and transforming it? That’s how I see DrawImage. You can think of DrawImageOptions as a “cursor” you can use to position and change the image.
Drawing uses X and Y coordinates, with the Y axis going downward. By default, everything is drawn at the (0, 0) point, so the top-left corner of the base image.
To move the image, use GeoM.Translate:
op := &ebiten.DrawImageOptions{}
op.GeoM.Translate(150, 200)
screen.DrawImage(PlayerSprite, op)
This Translate call moves the image 150 pixels right and 200 pixels down. You can use negative numbers to go left and up, respectively. (If you move too far away, you may not see the image on the screen).
Use GeoM.Rotate to rotate the image:
op := &ebiten.DrawImageOptions{}
op.GeoM.Rotate(45.0 * math.Pi / 180.0)
screen.DrawImage(PlayerSprite, op)
This rotates the image 45° clockwise. (The unit is radians. If you prefer working with degrees, use the degrees * math.Pi / 180.0 formula to get them.)
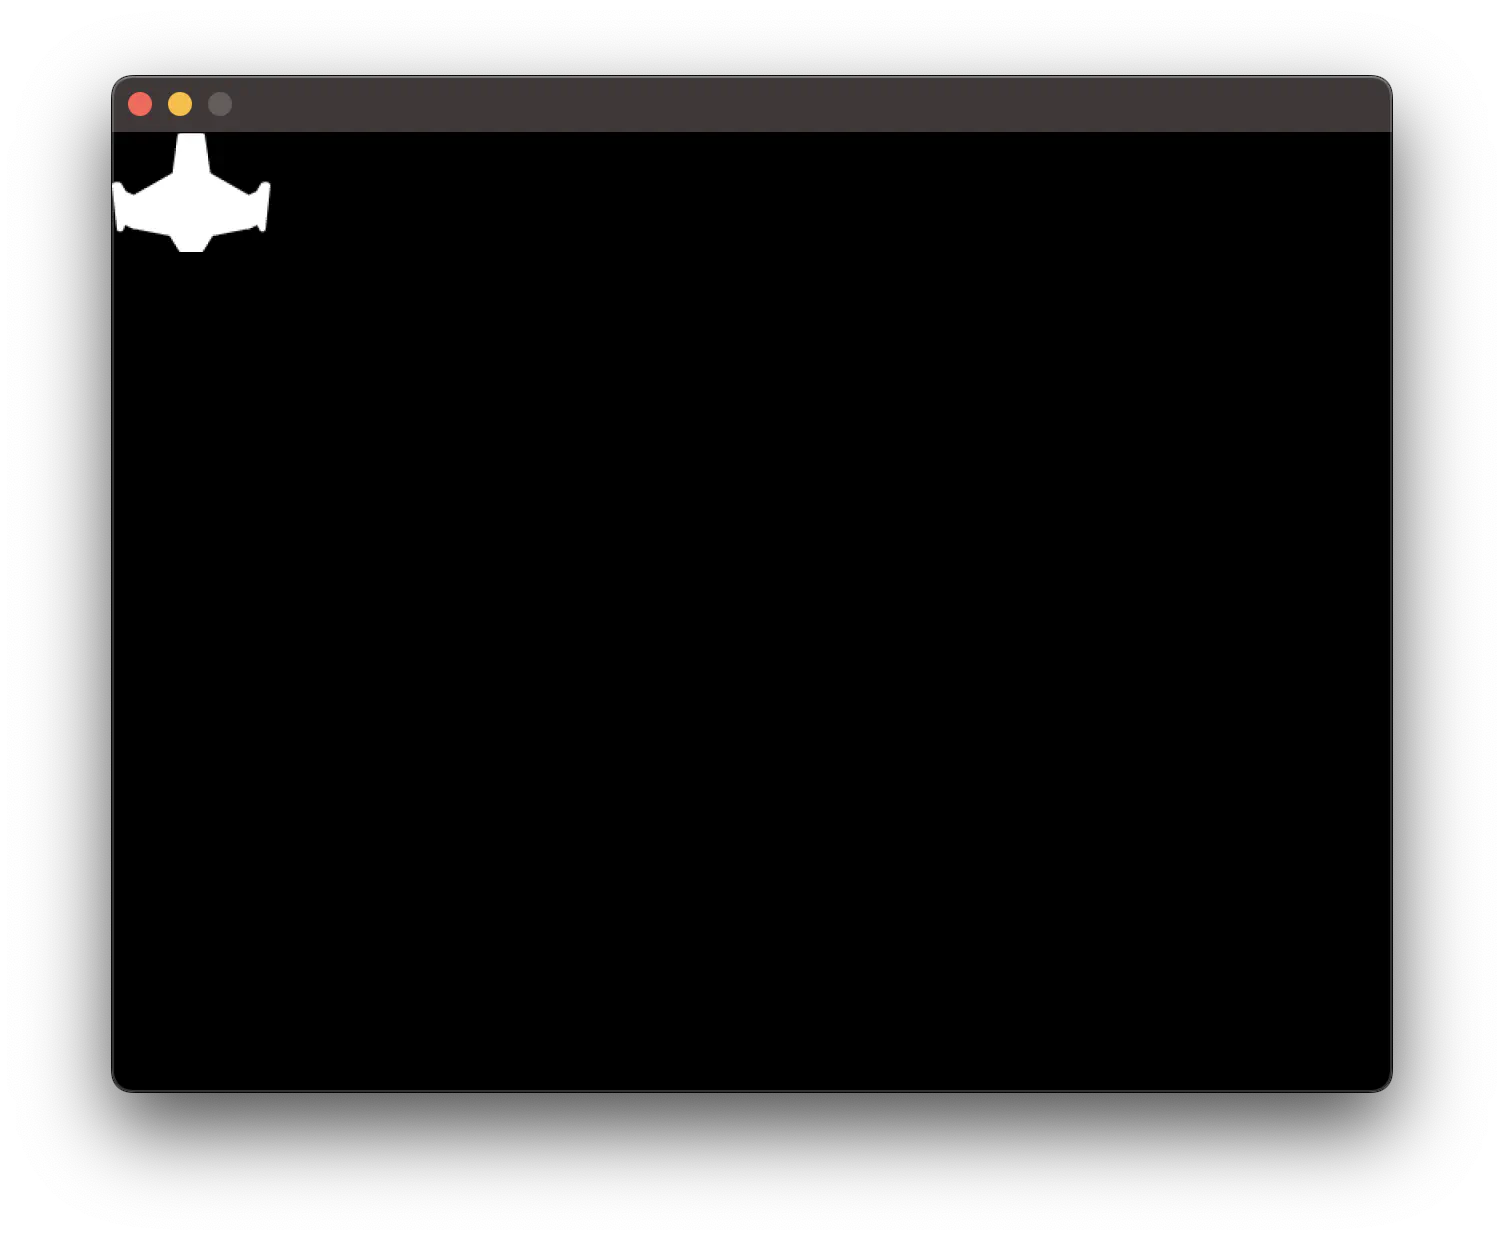
Can you see how the image is partially off-screen now? That’s because the pivot point (the point “around” which the image is being rotated) is the top-left corner of the image. I’ll show how to work around this in a bit.
Using negative values rotates the image counter-clockwise.
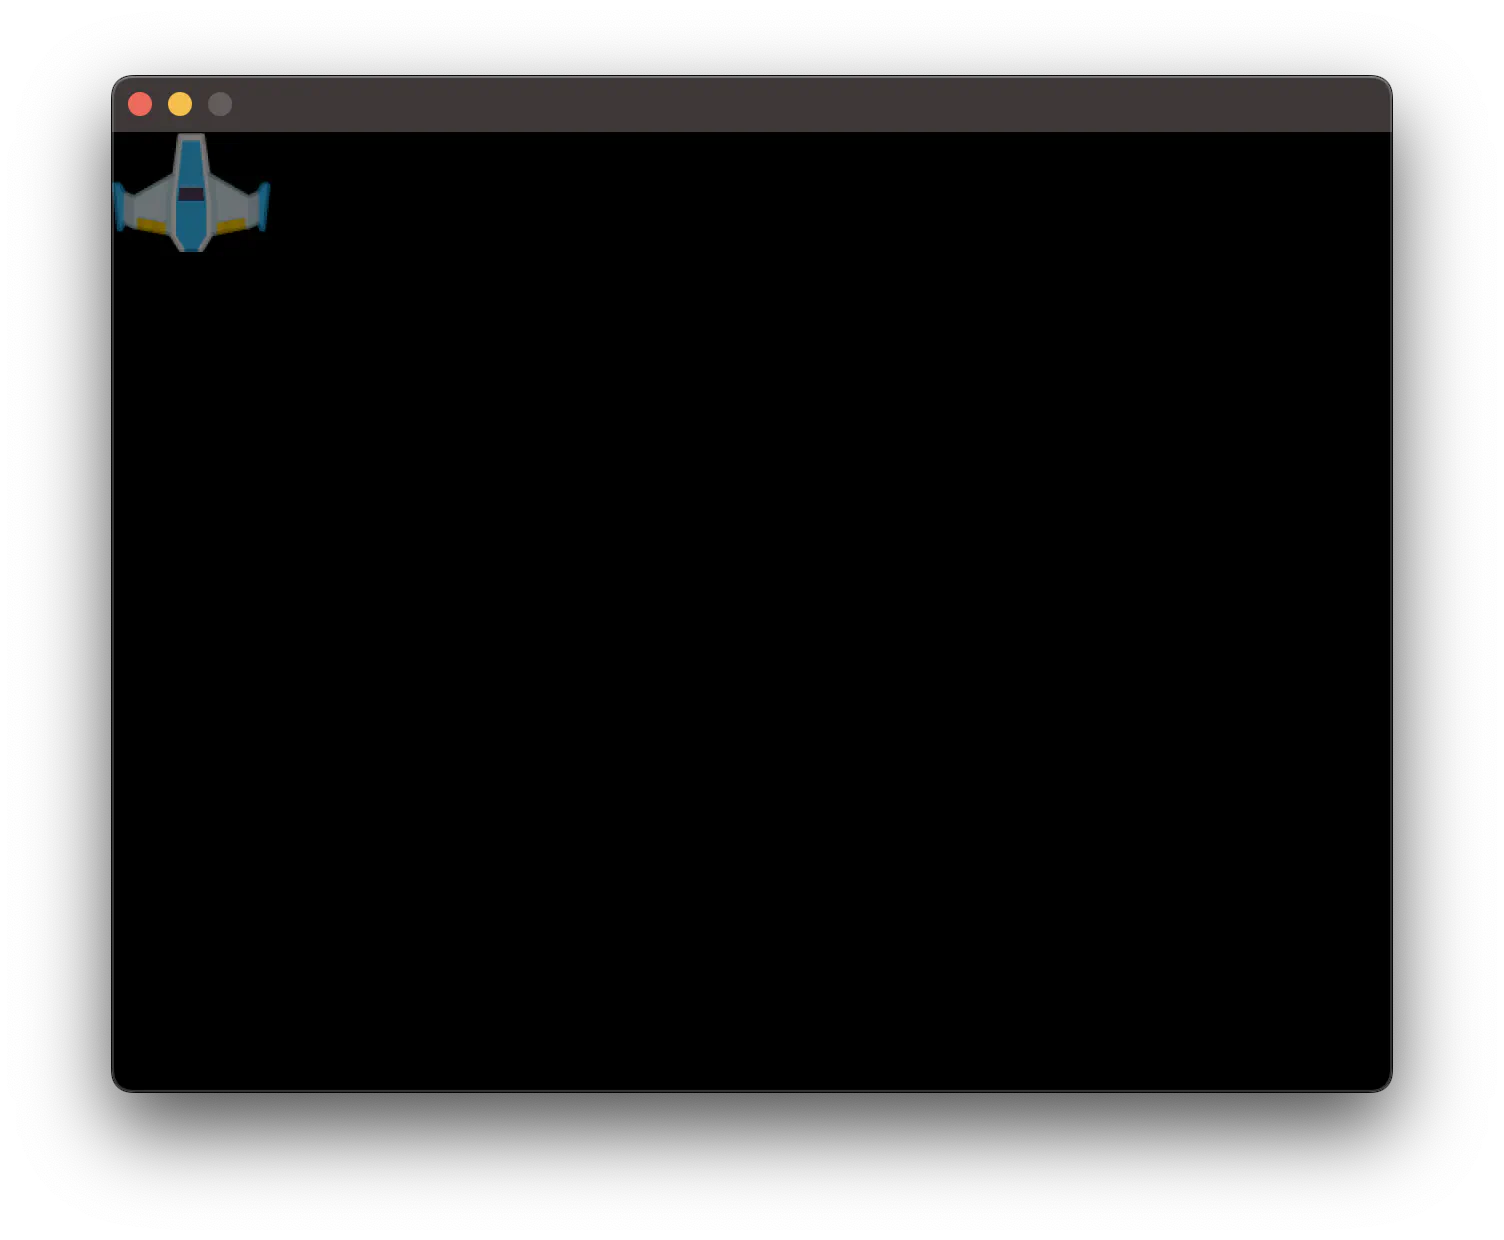
Finally, there’s GeoM.Scale, which lets you draw smaller or bigger images:
op := &ebiten.DrawImageOptions{}
op.GeoM.Scale(2, 2)
screen.DrawImage(PlayerSprite, op)
This Scale call makes the image twice as big horizontally and vertically.
Passing negative values flips the image horizontally or vertically. For example, to draw the image upside-down, use:
op.GeoM.Scale(1, -1)
You now know the basic tools to control images in a game: their position, rotation, and scale.
You can combine all of them in a single DrawImage call. There’s a caveat, though: the order matters. If you use Translate first and then apply the rotation or scale, you may not see what you expect because the change will be applied to the new position.
To illustrate this, let’s see how to rotate the image around its center (a common use case).
You need to move the pivot point to the image’s center. You can find it simply by dividing the image’s width and height by half. (Calculating stuff based on the image size is also super common.)
width := PlayerSprite.Bounds().Dx()
height := PlayerSprite.Bounds().Dy()

halfW := float64(width / 2)
halfH := float64(height / 2)
You need to move the image by the negative values first. This is so the image’s center aligns with the origin point (0, 0). Then, apply the rotation and move the image “back” by the same amount.
op.GeoM.Translate(-halfW, -halfH)
op.GeoM.Rotate(45.0 * math.Pi / 180.0)
op.GeoM.Translate(halfW, halfH)

It might be easier to grasp using this animation of all steps (scaled three times):
Changing colors
Another useful option is changing the sprite’s color. You can use it to draw an image that looks like the sprite but with a solid color. Of course, this makes the most sense if you use sprites with a transparent background.
The syntax is similar, although you need to use the recently added colorm package.
op := &colorm.DrawImageOptions{}
cm := colorm.ColorM{}
cm.Translate(1.0, 1.0, 1.0, 0.0)
colorm.DrawImage(screen, PlayerSprite, cm, op)
The first three arguments of Translate are red, green, and blue values and go from 0.0 to 1.0 (0% to 100%). The last one is alpha (transparency).
You can control the alpha field to make sprites transparent, creating cool effects like adding a shadow. To keep the transparent background unchanged, use Scale instead of Translate. Keep the first three arguments at 1.0, so they don’t change.
op := &colorm.DrawImageOptions{}
cm := colorm.ColorM{}
cm.Scale(1.0, 1.0, 1.0, 0.5)
colorm.DrawImage(screen, PlayerSprite, cm, op)
Combining options
You can do more with DrawImageOptions, but this should be all you need to start making games.
For example, here’s an evolution animation I created in airplanes:
I really like how it turned out. The best part is that I didn’t use graphic assets for the animation. It’s all done with DrawImageOptions and goes like this:
- Change the color of the sprite to white.
- Create a new sprite (also white) on top of the current one, with the scale set to (0, 0) (invisible).
- Scale the new sprite to scale (1, 1) over time.
- Scale the old sprite to scale (0, 0) over time.
- Remove the white color.
Can you notice how the shadow evolves as well? It’s the same idea but using a gray sprite and some transparency.
 Are you experienced engineer who wants to learn Go basics?
You don't become an engineer by watching videos.
Learn Go hands-on by building real projects.
The logic
To make the game do anything interesting, you need to fill in the Update method. You keep all logic there while the Draw method draws images (on the screen or on top of each other).
The basic idea of the game logic is simple: the Game struct holds some state, and the Update method changes this state. Draw reads the state and draws images based on it.
A classic example of a game state is the player’s position. In 2D games, this will usually be a pair of (X, Y) values, also known as a vector.
type Vector struct {
	X float64
	Y float64
}

type Game struct {
	playerPosition Vector
}
The zero-value of Vector is (0, 0), like any struct in Go. Let’s initialize the game state with a predefined value:
g := &Game{
	playerPosition: Vector{X: 100, Y: 100},
}
All left to do is to update the Draw method so it draws the player’s sprite at the given position. This shouldn’t be surprising:
op := &ebiten.DrawImageOptions{}
op.GeoM.Translate(g.playerPosition.X, g.playerPosition.Y)
screen.DrawImage(PlayerSprite, op)
Note how we call Translate always with the current position of the player. Each time Draw is called, the screen is empty, and the images are drawn from scratch. (Ebitengine might optimize this, but we don’t need to care now.)
Movement
To move the player to the right, keep increasing the X position in Update.
Do you remember that Update is called in an infinite loop? This becomes important now, as you need to decide how fast to move the player.
func (g *Game) Update() error {
	speed := 5.0
    g.playerPosition.X += speed

	return nil
}
speed is the number of pixels the position changes in a single tick (one Update call). With the default 60 ticks per second, the image would move 300 pixels per second to the right.
It may be easier to keep the speed as “pixels per second” instead of “pixels per tick”. In this case, calculate it like this:
// Move 300 pixels per second
speed := float64(300 / ebiten.TPS())
Controls
Let’s now allow moving the player using the arrow keys. The idea stays the same: we need to update the position. Not every tick, though, but only if a key is pressed.
func (g *Game) Update() error {
	speed := 5.0

	if ebiten.IsKeyPressed(ebiten.KeyDown) {
		g.playerPosition.Y += speed
	}
	if ebiten.IsKeyPressed(ebiten.KeyUp) {
		g.playerPosition.Y -= speed
	}
	if ebiten.IsKeyPressed(ebiten.KeyLeft) {
		g.playerPosition.X -= speed
	}
	if ebiten.IsKeyPressed(ebiten.KeyRight) {
		g.playerPosition.X += speed
	}

	return nil
}
ebiten.IsKeyPressed returns true if the given key is pressed in the current “tick” (remember, Update is called about 60 times per second by default).
The other function you might need is ebitenutil.IsKeyJustPressed, which returns true just in the tick the player presses the key. It’s the difference between “hold space to keep jumping” and “even if you keep holding space, you jump just once”. Note it’s in the ebitenutil package not ebiten, in contrast to IsKeyPressed.
Note how we don’t use if-else — thanks to this, the player can move diagonally by holding two arrows at a time.
Tip
Moving diagonally this way is naive and faster than moving in one direction at a time. If that’s not what you want, you need to adjust for it.
var delta Vector

if ebiten.IsKeyPressed(ebiten.KeyDown) {
	delta.Y = -speed
}
if ebiten.IsKeyPressed(ebiten.KeyUp) {
	delta.Y = speed
}
if ebiten.IsKeyPressed(ebiten.KeyLeft) {
	delta.X = -speed
}
if ebiten.IsKeyPressed(ebiten.KeyRight) {
	delta.X = speed
}

// Check for diagonal movement
if delta.X != 0 && delta.Y != 0 {
	factor := speed / math.Sqrt(delta.X*delta.X+delta.Y*delta.Y)
	delta.X *= factor
	delta.Y *= factor
}

g.playerPosition.X += delta.X
g.playerPosition.Y += delta.Y
Timers
A very common need in games is changing the logic with time. For example, you want the enemy object to move for two seconds to the right and then back to the left. Or you want the boss to cast a spell every five seconds.
You can’t use a regular way to measure time, using time.Now() and time.Since() due to how the Update method works (running at a constant speed of 60 ticks per second).
The idea is to keep counting ticks that have happened since the timer started. Then, you take some action and reset it.
I like to keep the Timer as a separate struct with a nice API.
type Timer struct {
	currentTicks int
	targetTicks  int
}

func NewTimer(d time.Duration) *Timer {
	return &Timer{
		currentTicks: 0,
		targetTicks:  int(d.Milliseconds()) * ebiten.TPS() / 1000,
	}
}

func (t *Timer) Update() {
	if t.currentTicks < t.targetTicks {
		t.currentTicks++
	}
}

func (t *Timer) IsReady() bool {
	return t.currentTicks >= t.targetTicks
}

func (t *Timer) Reset() {
	t.currentTicks = 0
}
And here’s a short example of using it:
g := &Game{
	attackTimer: NewTimer(5 * time.Second),
}

// ...

func (g *Game) Update() error {
	g.attackTimer.Update()
	if g.attackTimer.IsReady() {
		g.attackTimer.Reset()

		// Execute the attack!
	}
}
Game Objects
Keeping the player’s position directly in the Game struct is like using global variables. It would be challenging to maintain non-trivial games this way.
Encapsulation is a good improvement: having building blocks you can use instead of dealing with the details. A simple game object (or entity or whatever you want to call it) can be a struct with a position and sprite.
There are many approaches to organizing the game logic, and you can use whatever makes sense to you. An easy way to start is to have each game object expose its own Update and Draw methods, and call them in the Game’s Update and Draw.
type Player struct {
	position Vector
	sprite   *ebiten.Image
}

func NewPlayer() *Player {
	return &Player{
		position: Vector{X: 100, Y: 100},
		sprite:   PlayerSprite,
	}
}

func (p *Player) Update() {

}

func (p *Player) Draw(screen *ebiten.Image) {
	op := &ebiten.DrawImageOptions{}
	op.GeoM.Translate(p.position.X, p.position.Y)
	screen.DrawImage(p.sprite, op)
}
Now the Game methods don’t concern about the details of the Player:
type Game struct {
	player *Player
}

func (g *Game) Update() error {
	g.player.Update()
}

func (g *Game) Draw(screen *ebiten.Image) {
	g.player.Draw(screen)
}
Let’s finish the Player implementation for this Asteroids clone.
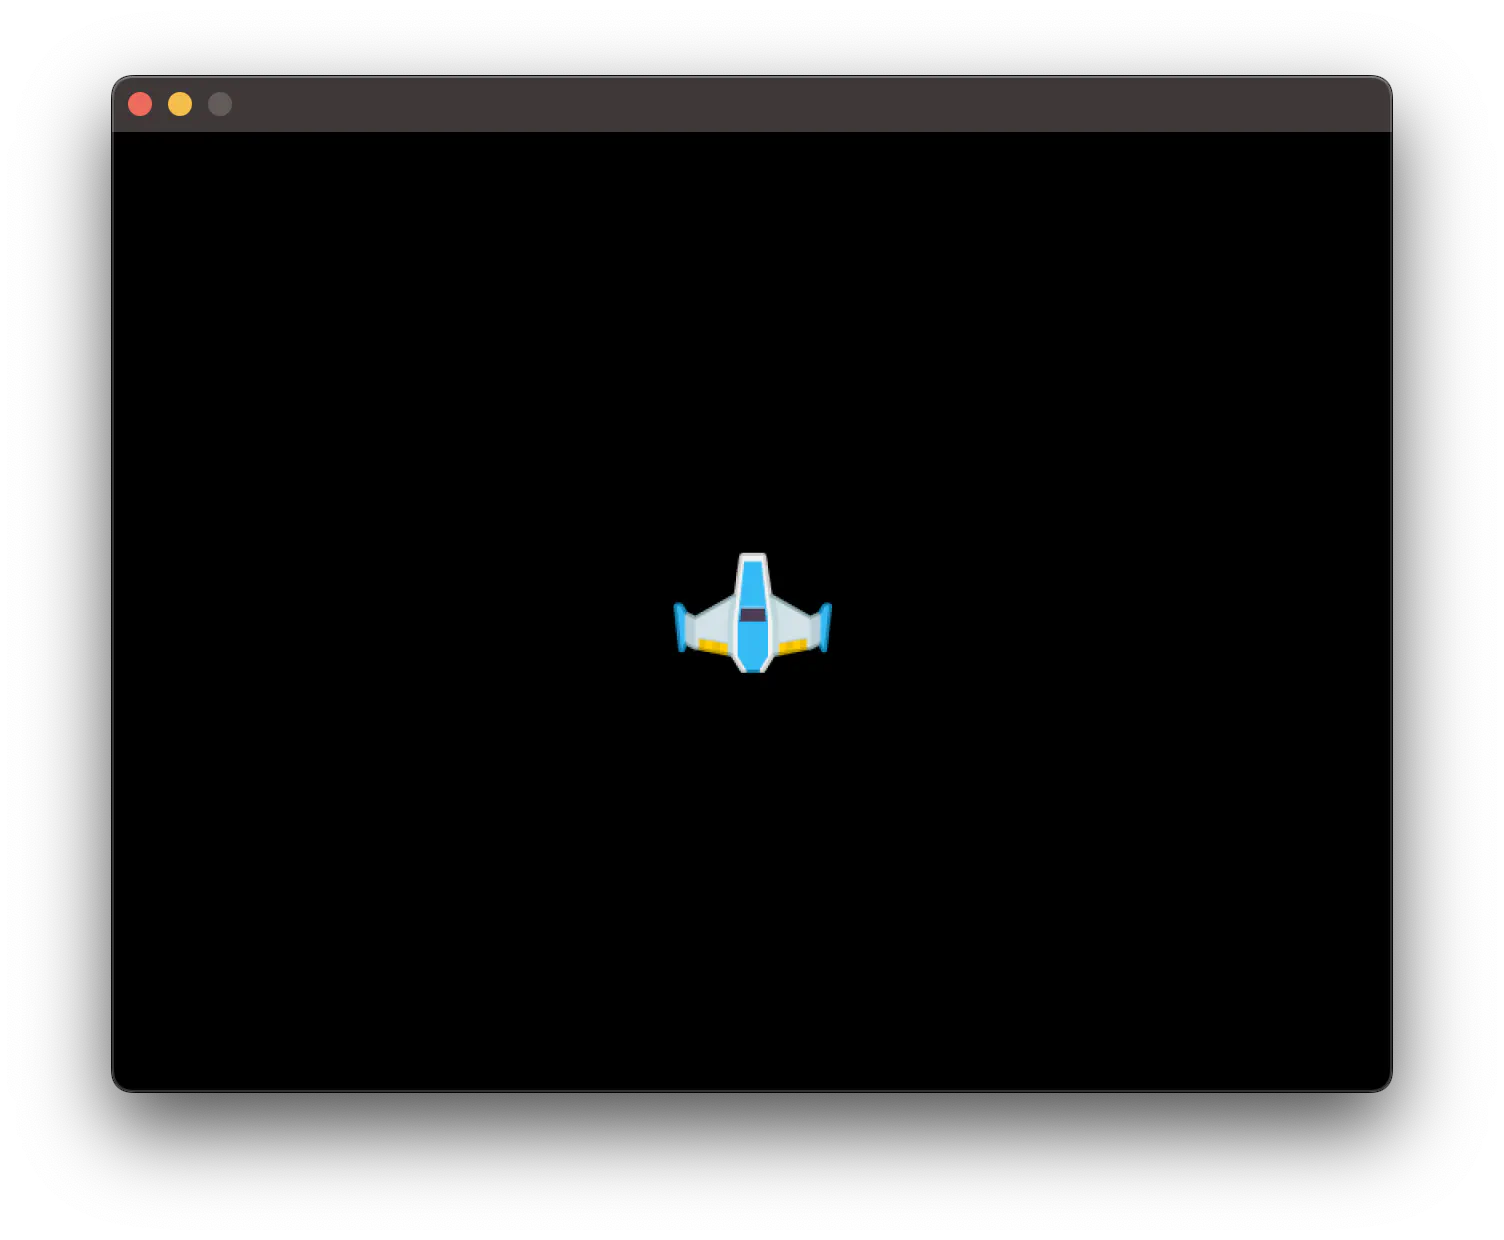
The player should be spawned in the center of the screen. It’s easy to calculate if we know the screen’s width and height. First, define the screen size as constants.
const (
	ScreenWidth  = 800
	ScreenHeight = 600
)
Now is the time we use the third method of ebiten.Game’s interface: the Layout. It should return the size of the game window.
func (g *Game) Layout(outsideWidth, outsideHeight int) (int, int) {
	return ScreenWidth, ScreenHeight
}
Now, back to the NewPlayer constructor to set the initial position. The center of the screen is half of the screen’s width and height (X and Y). But remember, the player’s sprite top-left corner will be drawn at the given position. To keep it precisely in the center, we must move it left and up by half the sprite’s width and height.
func NewPlayer() *Player {
  	sprite := PlayerSprite

	bounds := sprite.Bounds()
	halfW := float64(bounds.Dx()) / 2
	halfH := float64(bounds.Dy()) / 2

  	pos := Vector{
		X: ScreenWidth/2 - halfW,
		Y: ScreenHeight/2 - halfH,
	}

	return &Player{
		position: pos,
		sprite:   sprite,
	}
}
Instead of moving the spaceship, the player should be able to rotate it. We can keep the rotation as float64 in the Player struct.
func (p *Player) Update() {
	speed := math.Pi / float64(ebiten.TPS())

	if ebiten.IsKeyPressed(ebiten.KeyLeft) {
		p.rotation -= speed
	}
	if ebiten.IsKeyPressed(ebiten.KeyRight) {
		p.rotation += speed
	}
}
Remember, the rotation unit is radians. 2π is a full rotation. I’ll stick to π / TPS, which means the player can rotate 180° per second.
Now, we need to update the Draw struct to take rotation into account (using the trick of rotating the image around its center).
func (p *Player) Draw(screen *ebiten.Image) {
	bounds := p.sprite.Bounds()
	halfW := float64(bounds.Dx()) / 2
	halfH := float64(bounds.Dy()) / 2

	op := &ebiten.DrawImageOptions{}
	op.GeoM.Translate(-halfW, -halfH)
	op.GeoM.Rotate(p.rotation)
	op.GeoM.Translate(halfW, halfH)

	op.GeoM.Translate(p.position.X, p.position.Y)

	screen.DrawImage(p.sprite, op)
}
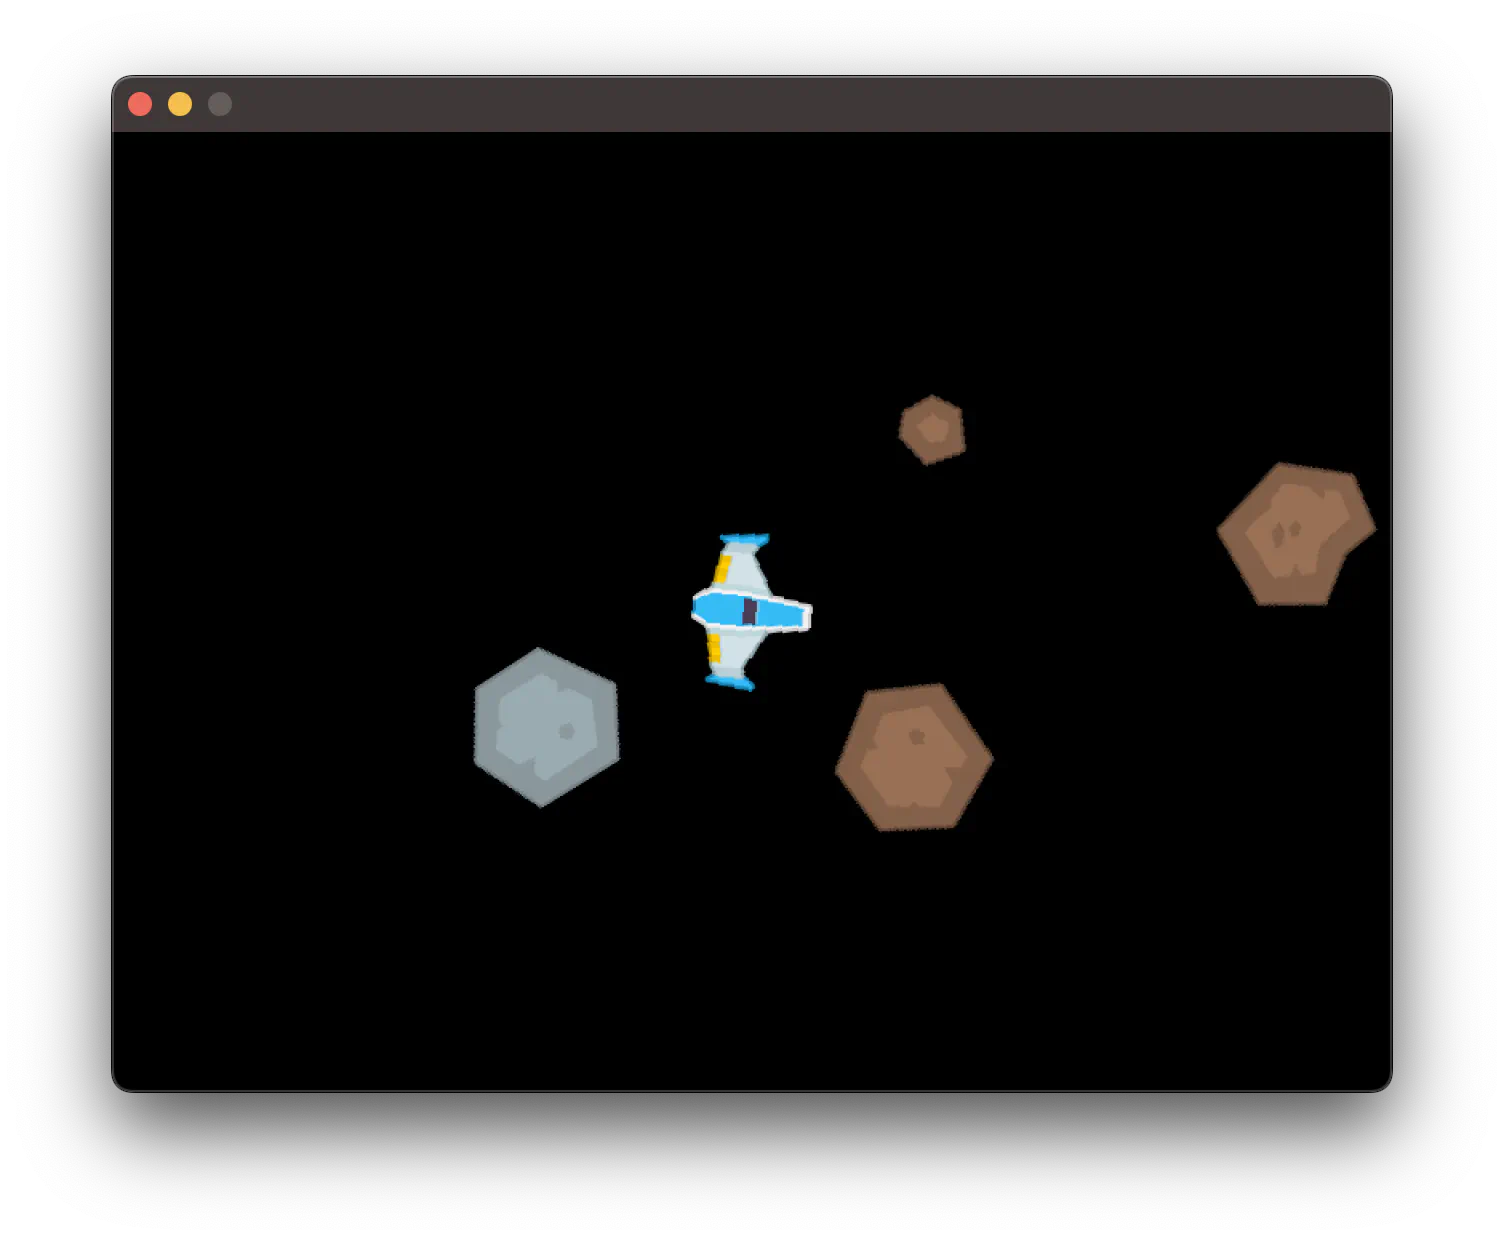
Spawning objects
Following the game object idea, let’s create a Meteor object. We can load many assets and pick one randomly to make it more interesting.
var MeteorSprites = mustLoadImages("meteors/*.png")

type Meteor struct {
	position Vector
	sprite   *ebiten.Image
}

func NewMeteor() *Meteor {
	sprite := MeteorSprites[rand.Intn(len(MeteorSprites))]

	return &Meteor{
		position: Vector{},
		sprite:   sprite,
	}
}
The Draw method is pretty much the same as for Player. (As you can imagine, there’s room for improvement here to keep the common code in one place — more on this later).
Now, Game needs to keep track of meteors. It’s the same idea as with Player, except we now need a slice of objects. Let’s also add a spawn timer.
type Game struct {
	player           *Player
	meteorSpawnTimer *Timer
	meteors          []*Meteor
}
Update and Draw iterate over all meteors and call their respective methods. And every time the timer is ready, a new meteor is added to the slice.
func (g *Game) Update() error {
	g.player.Update()

	g.meteorSpawnTimer.Update()
	if g.meteorSpawnTimer.IsReady() {
		g.meteorSpawnTimer.Reset()

		m := NewMeteor()
		g.meteors = append(g.meteors, m)
	}

  	for _, m := range g.meteors {
		m.Update()
	}

	return nil
}

func (g *Game) Draw(screen *ebiten.Image) {
	g.player.Draw(screen)

	for _, m := range g.meteors {
		m.Draw(screen)
	}
}
Tip
Note that the order of drawing matters.
The entities you draw later in Draw will appear on top of the ones drawn earlier (if their positions overlap).
Details of the meteor
The meteor should spawn at the edge of the screen. Here’s one approach to do it.
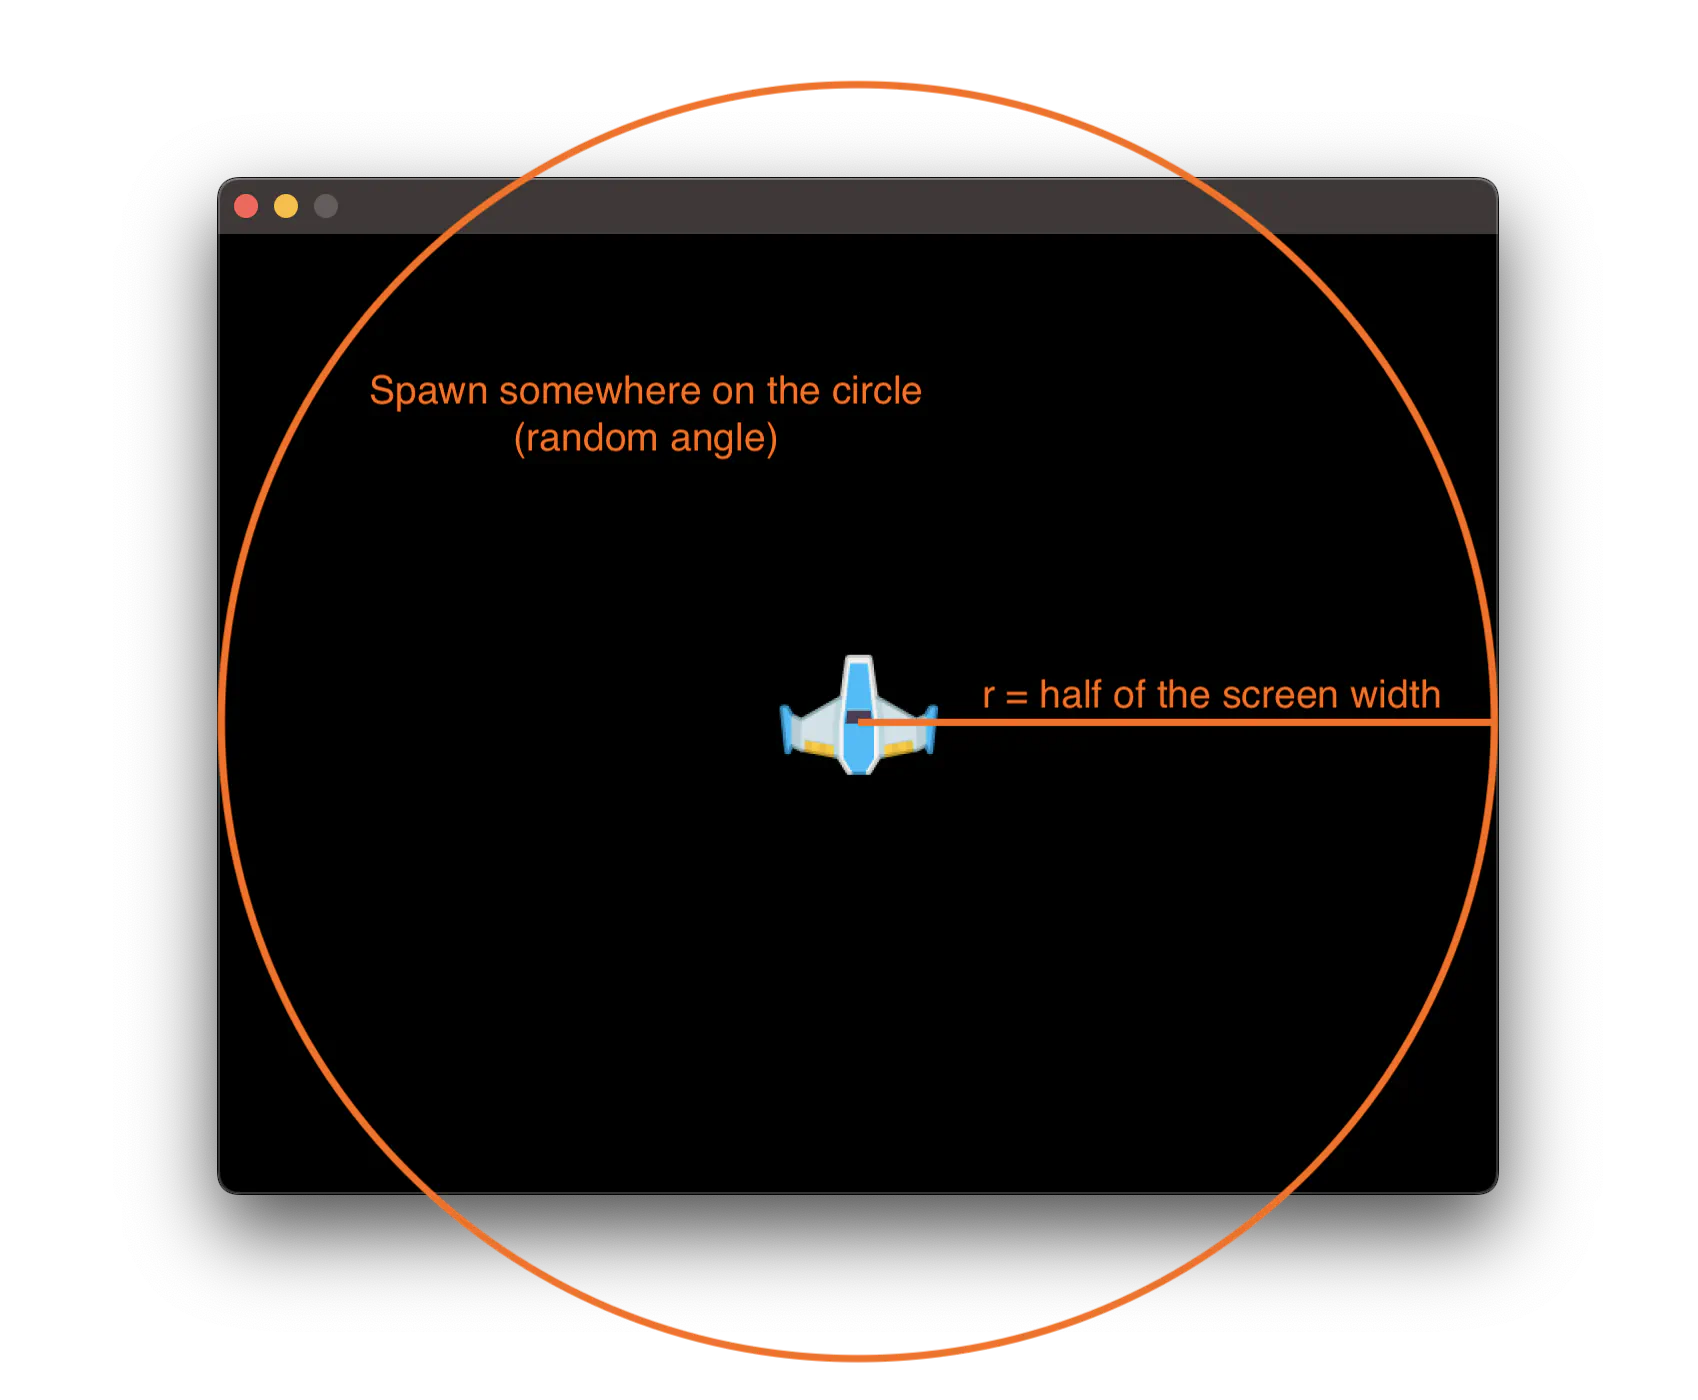
// Figure out the target position — the screen center, in this case
target := Vector{
	X: ScreenWidth / 2,
	Y: SreenHeight / 2,
}

// The distance from the center the meteor should spawn at — half the width
r := ScreenWidth / 2.0

// Pick a random angle — 2π is 360° — so this returns 0° to 360°
angle := rand.Float64() * 2 * math.Pi

// Figure out the spawn position by moving r pixels from the target at the chosen angle
pos := Vector{
	X: target.X + math.Cos(angle)*r,
	Y: target.Y + math.Sin(angle)*r,
}
As I mentioned, math is often handy for making games! You don’t need to know how it works in depth; just know the basic operations like “move 100 pixels from position (100, 200) at 30° angle”. (There’s absolutely no shame in having to consult the internet or AI every time you do it. 😅)
Next, the meteor should keep moving toward the player’s position (the screen center).
// Randomized velocity
velocity := 0.25 + rand.Float64()*1.5

// Direction is the target minus the current position
direction := Vector{
	X: target.X - pos.X,
	Y: target.Y - pos.Y,
}

// Normalize the vector — get just the direction without the length
normalizedDirection := direction.Normalize()

// Multiply the direction by velocity
movement := Vector{
	X: normalizedDirection.X * velocity,
	Y: normalizedDirection.Y * velocity,
}
NewMeteor can store the movement in the struct, and then the Update becomes trivial:
func (m *Meteor) Update() {
	m.position.X += m.movement.X
	m.position.Y += m.movement.Y
}
A final touch is adding a random rotation to each meteor. You can calculate it in the constructor:
rotationSpeed := -0.02 + rand.Float64()*0.04,
Then, keep moving and rotating the meteor.
func (m *Meteor) Update() {
	m.position.X += m.movement.X
	m.position.Y += m.movement.Y
	m.rotation += m.rotationSpeed
}
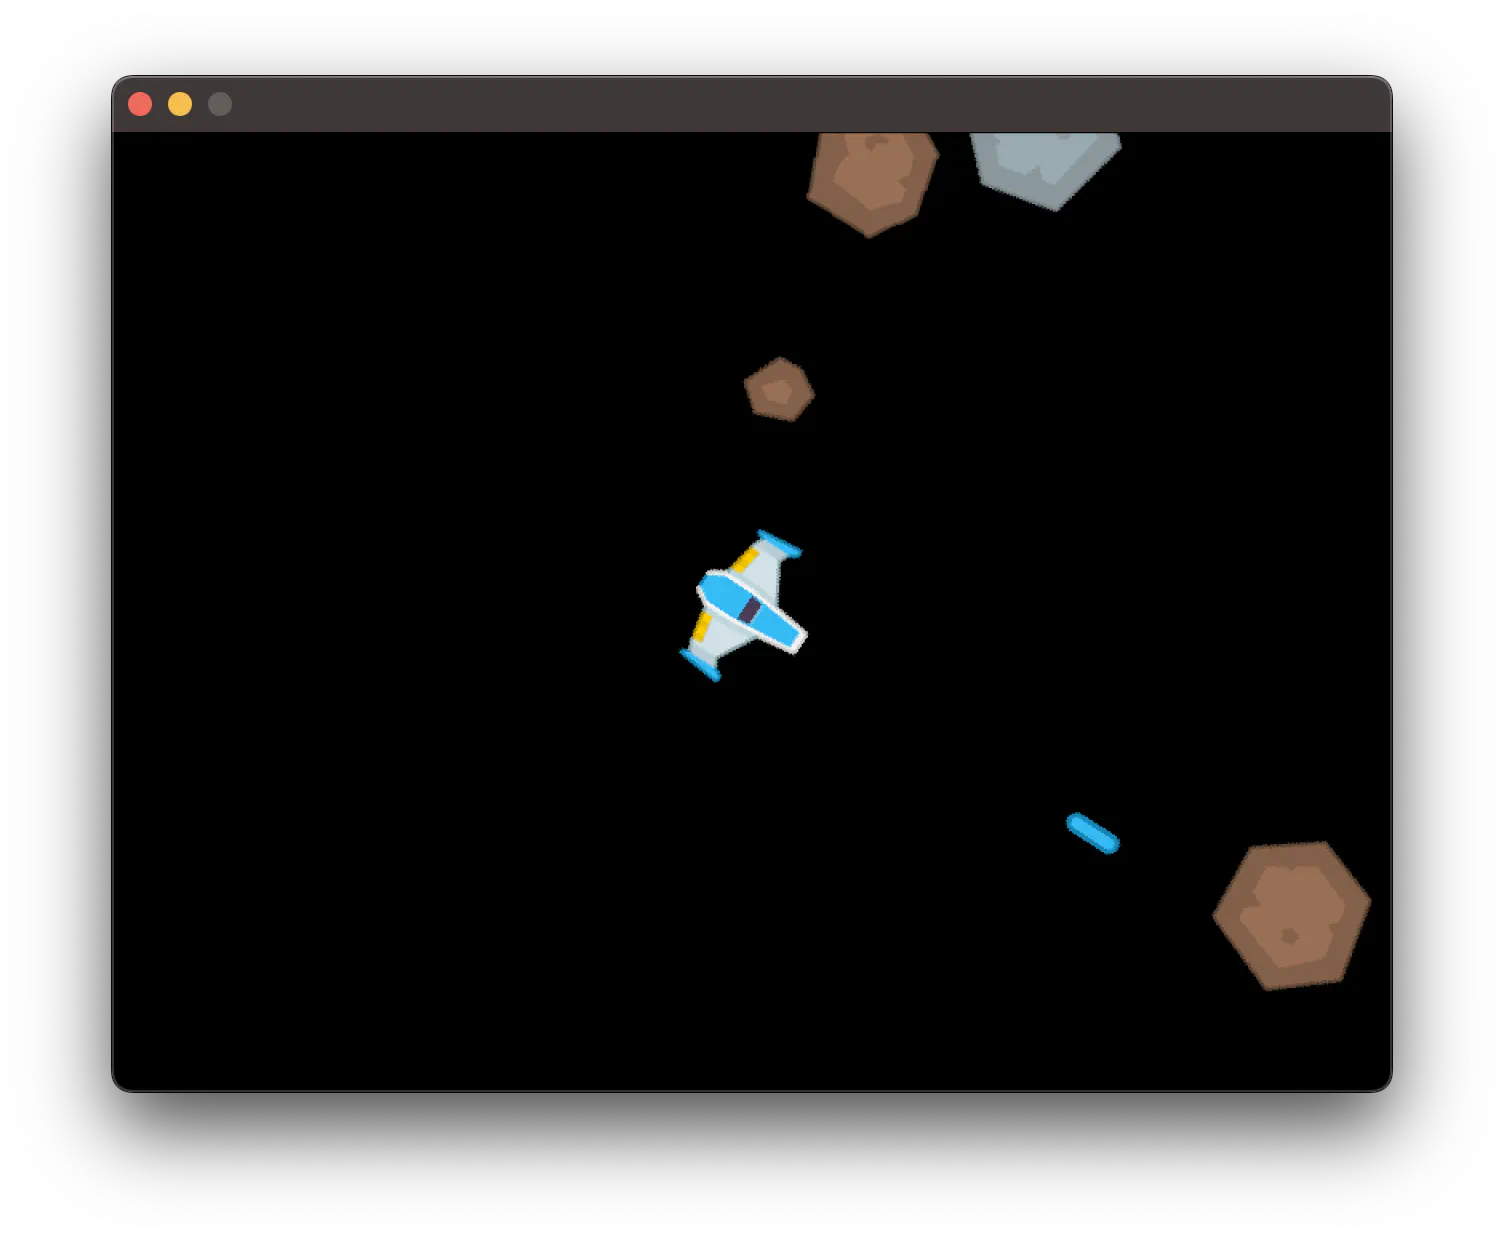
Shooting Bullets
Shooting bullets shouldn’t be surprising by now, so I won’t describe it in detail. You can see the complete source in the repository.
We need to:
- Keep a timer with a shooting cooldown.
- Spawn a new bullet when a button is pressed.
- Rotate the bullet and keep it moving in the direction it faces.
p.shootCooldown.Update()
if p.shootCooldown.IsReady() && ebiten.IsKeyPressed(ebiten.KeySpace) {
	p.shootCooldown.Reset()
	// Spawn the bullet
}
One new thing is having Player spawn bullets instead of Game.
But Game needs to keep track of the bullets, similar to meteors.
The simplest way is to pass Game to Player’s constructor and keep it in the struct.
Then, expose an AddBullet method from Game.
It’s not ideal, as it creates a cross-dependency between Player and Game, but it’s good enough for now.
I decided to calculate the spawn point on the Player side and make the Bullet’s constructor take it as an argument.
bulletSpawnOffset := 50.0

bounds := p.sprite.Bounds()
halfW := float64(bounds.Dx()) / 2
halfH := float64(bounds.Dy()) / 2

spawnPos := Vector{
	p.position.X + halfW + math.Sin(p.rotation)*bulletSpawnOffset,
	p.position.Y + halfH + math.Cos(p.rotation)*-bulletSpawnOffset,
}

bullet := NewBullet(spawnPos, p.rotation)
p.game.AddBullet(bullet)
Collisions
Detecting collisions is a complex topic, although, at the basic level, the concept is as simple as iterating over all objects and checking if they intersect.
To make things easier, let’s introduce a Rect struct that represents a rectangle and makes it easy to check intersections.
type Rect struct {
	X      float64
	Y      float64
	Width  float64
	Height float64
}

func NewRect(x, y, width, height float64) Rect {
	return Rect{
		X:      x,
		Y:      y,
		Width:  width,
		Height: height,
	}
}

func (r Rect) MaxX() float64 {
	return r.X + r.Width
}

func (r Rect) MaxY() float64 {
	return r.Y + r.Height
}

func (r Rect) Intersects(other Rect) bool {
	return r.X <= other.MaxX() &&
		other.X <= r.MaxX() &&
		r.Y <= other.MaxY() &&
		other.Y <= r.MaxY()
}
Next, each game object exposes a Collider() Rect method.
func (p *Player) Collider() Rect {
	bounds := p.sprite.Bounds()

	return NewRect(
		p.position.X,
		p.position.Y,
		float64(bounds.Dx()),
		float64(bounds.Dy()),
	)
}
In the Game’s Update, iterate over all objects and check for collisions.
for i, m := range g.meteors {
	for j, b := range g.bullets {
		if m.Collider().Intersects(b.Collider()) {
			// A meteor collided with a bullet
		}
	}
}

for _, m := range g.meteors {
	if m.Collider().Intersects(g.player.Collider()) {
		// A meteor collided with the player
	}
}
When a bullet collides with a meteor, we want to destroy both objects. In our case, this means just dropping them using slice operations. If they’re gone from the list, the game won’t call their Update and Draw methods, so they effectively disappear (and the garbage collector handles the rest for us).
if m.Collider().Intersects(b.Collider()) {
	g.meteors = append(g.meteors[:i], g.meteors[i+1:]...)
	g.bullets = append(g.bullets[:j], g.bullets[j+1:]...)
}
A meteor colliding with the player means the game is over. Let’s restart the game in this case.
func (g *Game) Reset() {
	g.player = NewPlayer(g)
	g.meteors = nil
	g.bullets = nil
}
UI
Drawing UI is similar to drawing other sprites. Two rules of thumb:
- It’s usually the last layer you draw, so it always stays on top.
- Sometimes, you want it on a separate section of the screen. In this case, you want to draw the game not directly on the screen but on a smaller canvas that you eventually draw next to the UI.
(You can create an empty image with
ebiten.NewImageand use it as a “panel”).
A classic UI example is the score the player gets after shooting down a meteor. We can keep the score as an integer in the Game struct, increment it when a meteor collides with a bullet, and reset it to zero on the game over.
What’s left is drawing the score on the screen. First, you need to load a font, which is similar to loading a sprite. (I’m using Kenney Fonts.)
var ScoreFont = mustLoadFont("font.ttf")

func mustLoadFont(name string) font.Face {
	f, err := assets.ReadFile(name)
	if err != nil {
		panic(err)
	}

	tt, err := opentype.Parse(f)
	if err != nil {
		panic(err)
	}

	face, err := opentype.NewFace(tt, &opentype.FaceOptions{
		Size:    48,
		DPI:     72,
		Hinting: font.HintingVertical,
	})
	if err != nil {
		panic(err)
	}

	return face
}
Then, call text.Draw in Game’s Draw:
text.Draw(screen, fmt.Sprintf("%06d", g.score), ScoreFont, ScreenWidth/2-100, 50, color.White)
If you want to be precise with the position, use font.BoundString
to get the bounds. In the example above, I just estimated something that looks good enough.
You can start with our e-book on modern Go applications!
Go With The Domain Three Dots Labs
Other concepts
This article is already quite long, but I want to mention some ideas you may find helpful once you start making games.
Scenes
A scene is a standalone part of your game. For example, the welcome screen, the main menu, or the game itself.
In the meteors project, there’s a single Game scene.
This could be extended so it’s possible to switch between scenes, and each has its own Update and Draw methods.
(And manages its own game objects.)
Camera
I was initially intimidated by the camera concept, but it turned out to be a simple idea. Your game “world” can be a big area, and you often don’t want to show all of it at once. With the camera concept, you draw only part of the bigger image. You can move the camera, make it follow the player, or scale it up and down to achieve the zoom effect.
A trivial example needs just two things:
- A
Camerastruct that keeps the position (and optionally scale and other fields). - An
offscreenimage (initialized withebiten.NewImage).
type Game struct {
	camera    *Camera
	offscreen *ebiten.Image

	player  *Player
	enemies []*Enemy
}

func (g *Game) Draw(screen *ebiten.Image){
	g.offscreen.Clear()

	// Draw the game on the offscreen image
	g.player.Draw(g.offscreen)
	for _, e := range g.enemies {
		e.Draw(g.offscreen)
	}

	// Draw the offscreen image on the screen
	op := &ebiten.DrawImageOptions{}
	op.GeoM.Translate(-g.camera.X, -g.camera.Y)
	screen.DrawImage(g.offscreen, op)
}
As you update the camera’s position, the part of the offscreen image will also change.
Animations
An animation means changing the sprite of an object over time. Sometimes, just two or three sprites can create an animation that makes the game look more alive.
To implement it, create a slice of sprites, a timer, and a “current sprite index”. Then, increase the index as the timer resets.
func (p *Player) Update() {
	p.timer.Update()
	if p.timer.IsReady() {
		p.timer.Reset()

		p.index++
		if p.index >= len(p.sprites) {
			p.index = 0
		}

		p.sprite = p.sprites[p.index]
	}
}
Animation sprites often come as a single file with frames next to each other.
You can use the SubImage method to extract a single frame from the loaded image.
You can also “animate” other parameters of an object, like the sprite’s color or scale.
Deploying to the web
It’s easy to deploy your game with WebAssembly and host it anywhere.
See more details in the docs and on GitHub.
Entity Component System
You probably noticed many common parts between the Player, Meteor, and Bullet game objects. It’s tempting to extract the common code so it’s easier to create new objects, and it definitely makes sense.
One way to do it is by keeping a generic GameObject struct from which other game objects inherit. In Go, you could use struct embedding with similar results.
Entity Component System (ECS) is another approach that prefers composition over inheritance. The idea is to keep common components like position, sprite, and collider as separate structs and then create game objects (entities) by combining them. All the logic is kept in systems that iterate over all entities and update them.
There are many ECS libraries for Go. My pick is donburi, and my airplanes game is based on it.
Debugging
As with any code, you will sometimes get stuck with hard-to-debug bugs. While using prints for debugging sometimes helps, I like adding visual helpers in place, sort of “debug mode.” It often shows in a very explicit way where the issue is.
You can make it appear and hide after a key so it doesn’t interfere with regular gameplay. Here’s an example debug mode I introduced in airplanes:
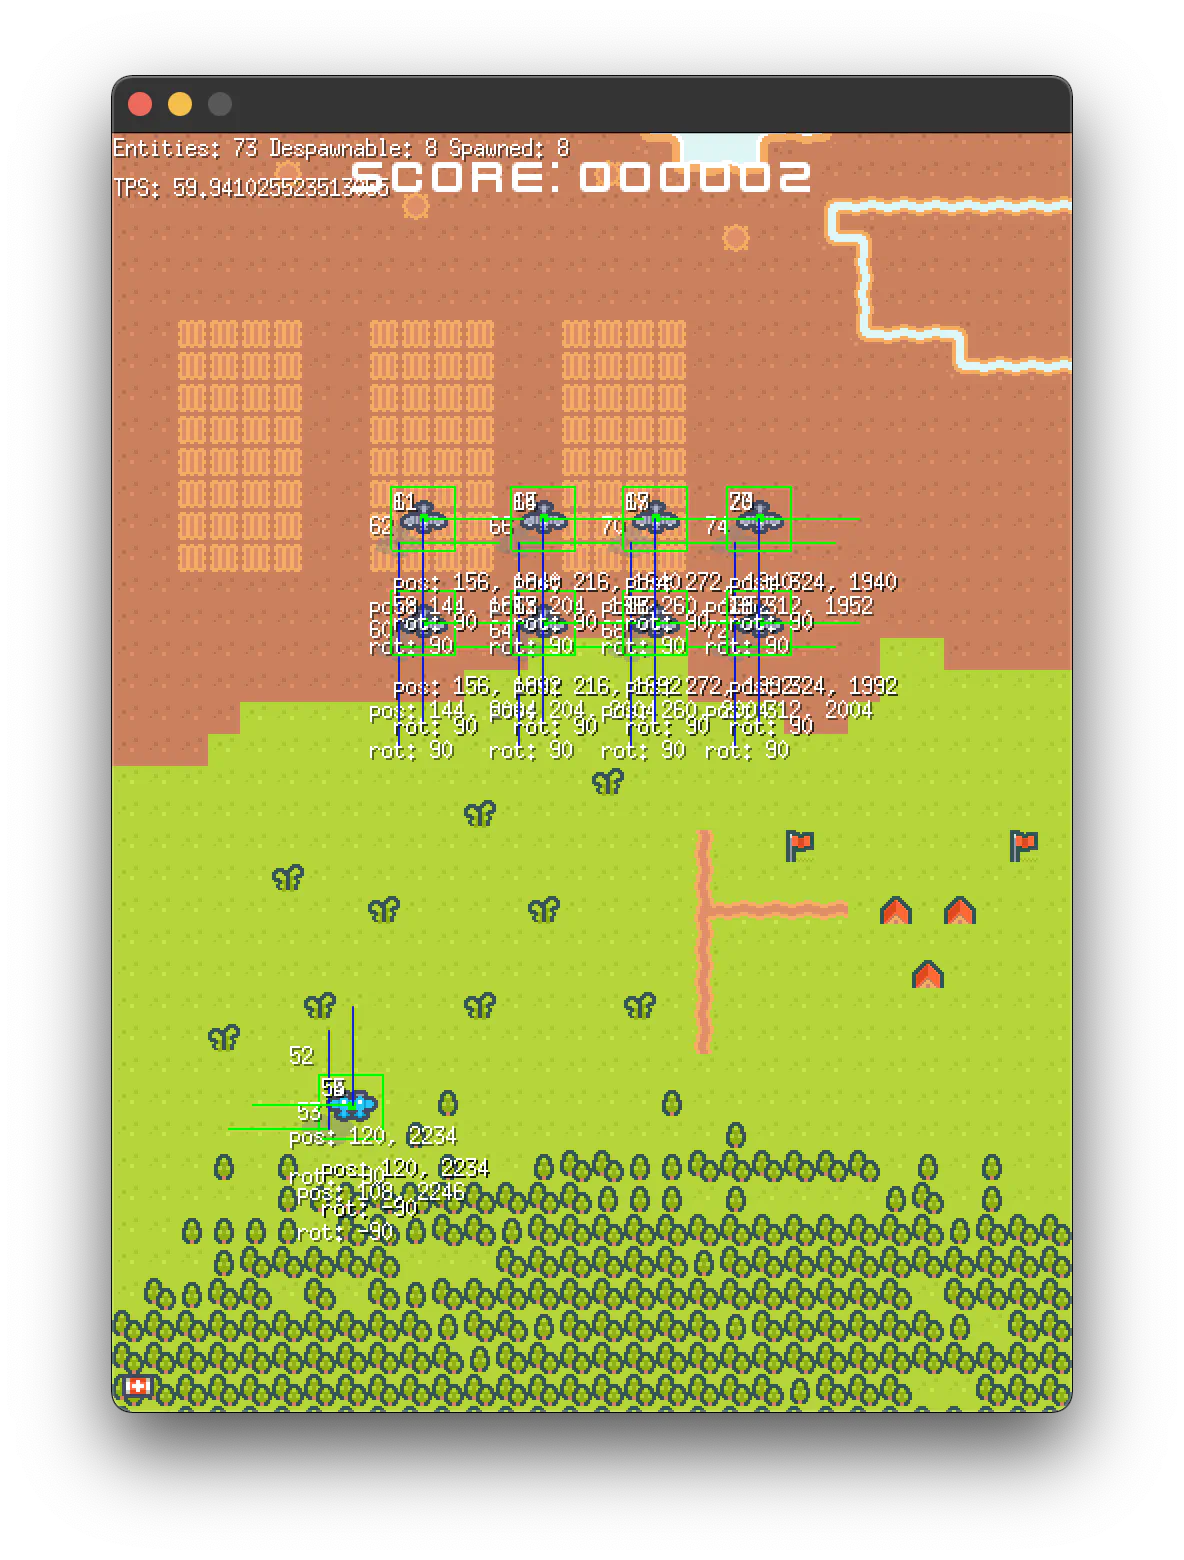
Ebitengine provides some utils for this:
ebitenutil.DebugPrintAt— to quickly draw a text.- The
vectorpackage has functions likeStrokeLine,StrokeRect, andStroneCircle.
Go build something!
All this barely scratches the surface of Gamedev. I picked topics that should let you make games and learn the basics. Let me know if you’d like to see more posts on some topics.
To learn more about Ebitengine, the official examples are a great starting point.
My example project is on GitHub, and you can play it online. Feel free to fork the repository and iterate over it!
Here are some ideas to implement:
- Add support for controls using a mouse or gamepad.
- Make big meteors “break” into small ones instead of disappearing.
- Have meteors drop power-ups that the player can collect.
- Allow switching weapons.
- Add AI spaceships that follow a more complex pattern than flying towards the player.
- Add more scenes like the main menu and high scores.
- Add sound effects. (It really makes a difference!)
If you can’t figure out how to create some mechanic you came up with (and it will happen a lot), try to figure out each step that needs to happen. For me, sketching using pen and paper often helps.
Now, it’s time to go and build something. Have fun!